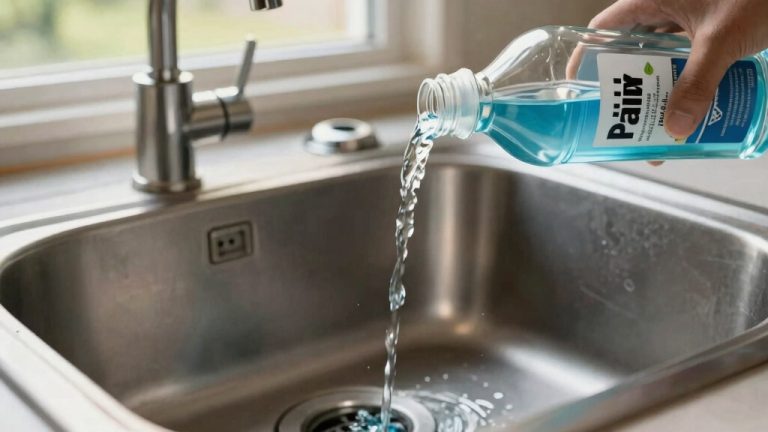
How to Remove Fingernail Polish From Wood? Safe DIY Tips
If you spill fingernail polish on wood, act quickly by sprinkling salt or sugar to absorb the liquid, then gently lift it with a soft brush or plastic card.
Use a non-acetone remover or 70% isopropyl alcohol applied with a cotton swab, working carefully along the grain to protect the finish.
Avoid harsh scrubbing and always test on a hidden spot first. Clean and dry the area afterward to prevent damage. Further details will help you preserve your wood’s look while fully removing the stain.
Key Takeaways
- Quickly blot fresh nail polish with absorbent materials like salt or sugar to prevent staining without rubbing the wood surface.
- Use non-acetone nail polish remover or 70-90% isopropyl alcohol applied gently with a cotton swab, testing first on a hidden spot.
- Clean the treated area with mild soap and water, then dry gently with a microfiber cloth to remove residue and avoid damage.
- Restore wood luster by applying a suitable wood conditioner or oil after cleaning to maintain finish and protect the surface.
- For stubborn stains, lightly sand damaged spots with fine-grit sandpaper and reapply compatible stain and finish for seamless repair.
Immediate Steps to Take After a Nail Polish Spill
When you spill nail polish on wood, acting quickly is essential to prevent the stain from setting. Start by sprinkling an absorbent like table salt or white sugar directly onto the wet polish. Let it sit for 3-5 minutes to soak up the liquid.
Then, use a plastic card or soft brush to gently lift the absorbent along with the polish, avoiding any rubbing that could spread the stain.
If needed, wipe the area with a slightly damp cloth and mild soap to remove residual stickiness. Because nail polish contains nitrocellulose that forms a hard film, prompt removal prevents deep bonding with the wood fibers.
Blot gently with diluted dish soap, rinsing carefully with water and drying immediately with a microfiber towel. Avoid harsh scrubbing or abrasive tools to protect the wood finish.
Using non-abrasive cleaners helps maintain the wood’s protective coating and prevents damage.
Safe Solvents for Removing Nail Polish From Wood
You’ll want to choose solvents that effectively remove nail polish without harming the wood finish. Non-acetone removers and isopropyl alcohol are reliable options that balance cleaning power with surface safety.
Always test the removal method on a small, inconspicuous area first to ensure it does not damage or discolor the wood surface patch test.
Be cautious with mineral spirits, as they can damage certain finishes if used improperly. Additionally, managing moisture levels is crucial to protect the wood’s integrity during cleaning, similar to precautions taken with steam cleaning painted walls.
Non-Acetone Remover Benefits
Although acetone-based removers are common, non-acetone removers provide a safer and more effective option for cleaning nail polish from wood surfaces.
They contain gentler chemicals that dissolve polish without stripping varnish or polyurethane, preserving the wood’s natural color and sheen.
Non-acetone formulas evaporate slower, allowing controlled application and minimizing the risk of whitening or dulling glossy finishes.
Flooring experts recommend them for finished, lacquered, or waxed wood because they prevent chemical burns and discoloration.
When using any remover, it is important to apply it carefully to avoid damage to the floor finish. These removers also contribute to lower toxic fumes, enhancing indoor air quality during use.
These removers are widely available, affordable, and require only simple tools like a soft cloth or cotton ball for application. You’ll see immediate results on fresh spills, and a mild soap rinse removes residue.
Additionally, non-acetone removers are safer for your health and the environment, with lower toxic fumes and biodegradable options.
Isopropyl Alcohol Usage
Non-acetone removers offer a gentler approach to cleaning nail polish from wood, but isopropyl alcohol stands out as another safe and effective solvent.
Use 70-90% isopropyl alcohol applied with a soft, lint-free cloth lightly soaked—not poured—onto the stain. Rubbing alcohol is known to be partially successful in removing nail polish from skin, indicating its effectiveness on surfaces other than nails.
Let it sit for about 30 seconds to soften the polish, then gently blot following the wood grain. Avoid rubbing to protect the finish.
Multiple applications may be needed for stubborn spots. To prevent potential damage, always use pH-balanced, stone-safe cleaners or gentle solvents suited for delicate surfaces.
Always test on an inconspicuous area first to check for discoloration or damage. After removing polish, wipe the area with a damp cloth, dry thoroughly, and consider applying wood conditioner to restore moisture.
Isopropyl alcohol provides effective removal while minimizing risk to sealed wood surfaces when used carefully and sparingly.
Mineral Spirits Cautions
When handling mineral spirits to remove nail polish from wood, exercise caution due to their flammable nature and potential to damage finishes if misused.
Use mineral spirits sparingly with a soft cloth or cotton swab, applying only to the stained area. Avoid soaking the wood and never rub aggressively; instead, blot gently to lift polish without harming the finish.
Mineral spirits are insoluble in water, which helps prevent unwanted spreading during spot treatment.
Work in a well-ventilated space to reduce inhalation risks, as fumes can accumulate despite mineral spirits’ relatively low volatility.
Test an inconspicuous spot first, since prolonged contact may dull or remove finishes like polyurethane or shellac. It is also wise to monitor the cleaning process closely to prevent any accidental fire hazards due to the flammable nature of mineral spirits.
After treatment, promptly remove residues and dry the surface manually. If dullness occurs, restore luster with wood conditioning oil. This careful approach minimizes damage while effectively tackling nail polish stains on wood.
Techniques for Applying Nail Polish Removers on Wood
When applying nail polish remover on wood, use gentle dabbing motions with a soft cloth or cotton ball to avoid damaging the finish. Limit the amount of solvent to prevent saturation. Always work in small sections for better control.
Following these careful techniques helps protect the wood while effectively lifting the polish. Additionally, placing a towel as a barrier between wood and heat can be essential when using heat to assist in stain removal.
It is also important to ensure the wood surface is clean and dry before application to avoid unwanted corrosion.
Gentle Application Methods
Although removing fingernail polish from wood requires careful handling, you can effectively minimize damage by using gentle application methods.
Always test your chosen remover on a hidden wood area. Prefer non-acetone removers or rubbing alcohol applied with a soft cloth, blotting gently along the grain. Avoid harsh rubbing; instead, use light, circular motions.
Using absorbent materials can help contain any excess polish during removal. After removal, clean with mild soap and warm water, then dry with a microfiber towel.
It is important to ensure proper ventilation when using solvents like rubbing alcohol to maintain safety during the removal process.
| Step | Recommended Tool | Technique |
|---|---|---|
| Test Area | Hidden spot | Apply remover lightly |
| Apply Remover | Soft cloth/cotton ball | Blot gently, follow grain |
| Remove Excess | Cotton swab | Absorb fresh spills |
| Clean Surface | Mild soap & water | Wipe carefully |
| Dry Surface | Microfiber towel | Pat dry without rubbing |
Solvent Usage Tips
Since nail polish removers vary in their chemical strength and effects on wood, you should select and apply them carefully to prevent damage.
Opt for non-acetone removers first, especially on delicate or antique wood, as they reduce finish risk. Always test removers on an inconspicuous area before full use.
Use cotton balls or soft cloths dampened—not soaked—with remover to control solvent contact. Apply briefly and gently, avoiding harsh rubbing or prolonged exposure, particularly with acetone-based removers.
Immediately wipe residue with a slightly damp cloth to limit absorption. To help remove any residual acetone safely, you can apply a mixture of baking soda and Vaseline in a 1:1 ratio and then gently wipe it off.
Proper ventilation is important during this process to avoid inhaling any harmful fumes from solvents.
Work in small sections, allowing wood to dry fully between treatments. Wear gloves and ensure good ventilation. Avoid oversaturating applicators and keep solvents away from glued joints.
Using Non-Acetone Removers to Protect Wood Finishes
Choosing a non-acetone nail polish remover helps you preserve the integrity of wood finishes by avoiding harsh solvents like acetone that can strip protective coatings.
These removers contain gentler solvents, such as ethyl acetate, reducing the risk of discoloration, whitening, or clouding of the wood surface.
To protect finishes further, it is important to avoid acidic or abrasive products, similar to best practices used when cleaning delicate stones like marble with marble-safe rust removers.
To minimize damage, saturate a soft cloth or cotton ball with remover and gently dab the polish stain without rubbing aggressively. Always test the product on an inconspicuous area first.
Apply sparingly to prevent liquid from penetrating the wood, and blot immediately to avoid spreading. Because damage occurs immediately upon contact, quick action is essential to protect the wood finish. After removal, clean the area with a damp cloth and apply a wood conditioner to restore oils and sheen.
Remember to work in a well-ventilated space and keep removers away from heat or flames.
Natural Alternatives for Tackling Nail Polish Stains
How can you remove nail polish stains from wood without relying on harsh chemicals? You can use natural alternatives that protect your wood’s finish while effectively lifting stains.
- Rubbing Alcohol: Gently blot the stain with a cloth soaked in isopropyl alcohol (70-90%), following the wood grain. Let it sit for 30 seconds on tough spots, then clean with mild soap and water. Always act quickly to minimize stain setting, especially on hard surfaces. Using gentle cleaning tools like a microfiber cloth helps avoid damage.
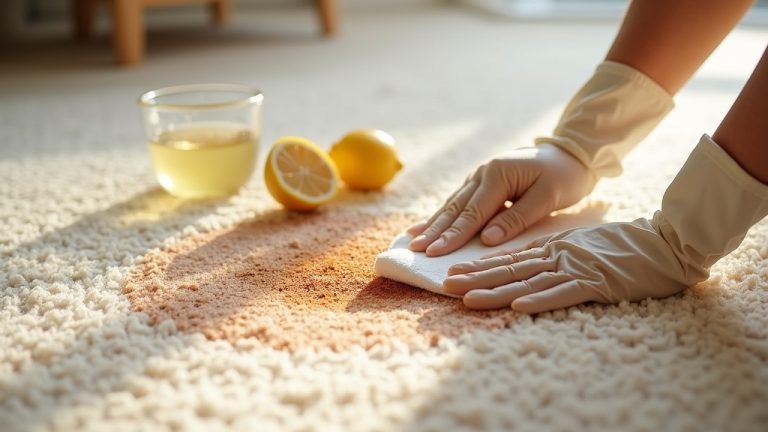
- Lemon Juice and Baking Soda Paste: Mix lemon juice and baking soda into a paste. Apply gently, leave for a few minutes, then wipe with a damp cloth. Suitable only for finished wood. This method is a safe alternative to harsh chemicals and helps maintain the wood’s finish.
- Sugaring Method: Sprinkle granulated sugar on fresh polish spills and rub softly to absorb. Follow with warm soapy water to clean. Avoid aggressive scrubbing to protect the finish. Regular maintenance and quick action prevent stains from becoming stubborn.
Tools That Help Remove Dried Nail Polish Without Damage
When removing dried nail polish from wood, selecting the right tools is essential to avoid damaging the surface. Use cotton balls or soft microfiber cloths to apply solvents gently, avoiding abrasive rubbing.
For precision, cotton swabs help target tight areas without spreading polish. It is recommended to use rubbing alcohol with a cotton swab as a gentle solvent option that can effectively remove stains without harming the wood finish.
Choose between acetone-based removers for quick dissolving, non-acetone removers for preserving finishes, or isopropyl alcohol as a safer alternative. To lift fresh polish, a plastic scraper or blunt card works well without scratching.
For stubborn spots, ultra-fine steel wool (#0000) can be used cautiously. Always test solvents and tools on a hidden area first.
After removal, apply wood conditioning oils to restore luster and protect the finish, ensuring your cleaning method maintains the wood’s durability.
Common Mistakes to Avoid When Cleaning Nail Polish Off Wood
Using the right tools and solvents sets you up for success, but mistakes during the cleaning process can still cause damage to your wood surfaces. To avoid common errors, keep these points in mind:
Choosing proper tools and solvents is key, but careful technique prevents damage to your wood surfaces.
- Avoid abrasives and harsh scrubbing: Don’t use metal brushes or steel wool, and never scrub vigorously. These actions can scratch, dent, or remove the wood’s finish, causing permanent damage. It’s best to use gentle, pH-neutral cleaners designed specifically for hardwood floors to preserve the finish.
- Limit liquid use: Excessive acetone or water can seep into the wood, leading to warping or discoloration. Apply solvents sparingly and wipe off any excess immediately. Testing any cleaning agent on a small, inconspicuous area first ensures it will not harm the wood’s surface.
- Remove residue and dry thoroughly: Leaving cleaning agents on the wood invites finish breakdown and mold growth. Always wipe clean with a dry cloth and let the area air dry before touching up. Proper cleaning techniques, like damp microfiber mopping, help remove stains without damaging the wood.
How to Test Cleaning Methods on Wood Surfaces?
Before applying any cleaner to your wood surface, always perform a spot test to prevent damage or discoloration.
Choose hidden areas like the underside or edges to safely evaluate how the wood reacts to the cleaning agent. This careful approach ensures you select the gentlest, most effective method for removing nail polish without harming the finish.
Since older finishes may be soft or worn, testing helps avoid applying harsh cleaners that could damage delicate surfaces.
Spot Testing Importance
Since wood types and finishes vary widely, you should always perform a spot test before applying any cleaning method. This step helps you avoid staining or damaging delicate finishes like lacquer or oil-based coatings.
Here’s how to approach it methodically:
- Apply a small amount of the chosen cleaning agent to an inconspicuous area using a clean, lint-free cloth or swab.
- Observe closely for immediate changes such as discoloration, swelling, or finish dullness. Use magnification if needed to detect subtle effects. Testing multiple times over intervals can provide a more accurate assessment of stain resistance.
- Wait the recommended time, then wipe off and reassess for any lingering residue or texture changes.
Record your observations precisely, noting the wood type, finish, and agent used. This assures safe, effective cleaning while preserving your wood surface.
Safe Area Selection
Although selecting a safe test area might seem straightforward, it requires careful judgment to protect your wood surface.
Start by choosing a less visible spot, like the underside or back of furniture, ensuring it shares the same finish and material as the stained area.
Regular cleaning and conditioning preserve appearance and can make subsequent stain removal easier and safer.
Avoid spots with previous damage, as they can skew results. The test area should be easily accessible and large enough to observe effects clearly.
Apply cleaning agents gently, starting with mild solutions such as dish soap or diluted vinegar, and monitor for color changes, texture alterations, or prolonged drying times. Document your findings carefully.
Post-Cleaning Care to Restore Wood Appearance
When you finish removing fingernail polish from wood, take care to gently wipe the area with a damp cloth to clear away any leftover residue from cleaning agents. Avoid soaking the surface to prevent swelling.
Once dry, assess the wood for roughness or dullness caused by polish remover. To restore the wood’s appearance:
- Lightly sand damaged spots with fine-grit sandpaper, then remove dust completely.
- Apply a wood stain that closely matches the original color, layering as needed for a natural blend. It is important to identify the wood type and stain color beforehand to choose the best matching stain and ensure a seamless repair surface preparation.
- Reapply a compatible protective finish in thin, even coats, allowing full drying between applications.
Tips for Maintaining Wood to Prevent Future Stains
To keep your wood surfaces looking pristine and free from future stains, you need to focus on proper preparation and sealing techniques.
Sand wood evenly—180 grit on face grain, 220 on end grain—to ensure smoothness and consistent stain absorption. Pre-treat with a blotch prevention formula and apply a pre-stain conditioner for uniform color.
Using a blotch prevention formula can significantly reduce uneven stain absorption and minimize blotchiness on porous woods.
Use thin film-forming sealers that balance absorption without fully sealing the wood. Avoid household oils; opt for specialized wood care oils. Stir stains thoroughly, test on hidden areas, and remove hardware before application.
After staining, apply clear protective finishes only when fully dry. Regularly inspect surfaces, reapplying finishes as needed.
Protect wood from moisture, sunlight, and contaminants, using pads or covers. Handle wood with clean hands to minimize oils and dirt transfer.
Frequently Asked Questions
Can Nail Polish Cause Permanent Damage to All Types of Wood?
Picture wood like a sponge—some soak up stains deeply, others resist. Nail polish can cause permanent damage, but not all wood suffers equally.
Unfinished or porous wood absorbs pigments readily, risking lasting stains. Finished hardwoods with dense, protective layers fend off penetration better but aren’t immune to solvent damage.
You’ll find vulnerability varies by wood type and finish quality, so always treat spills immediately to protect your surfaces from permanent harm.
How Long Should I Wait Before Walking on Cleaned Wood Floors?
You should wait at least 24 hours before walking on cleaned wood floors to guarantee the finish dries properly.
For water-based finishes, light foot traffic is usually safe after 1-3 hours, but avoid heavy walking until full cure, about 3 days.
Oil-based finishes require at least 24 hours before walking and up to 30 days to fully cure. Following these times helps prevent marks, scratches, and premature wear on your floors.
Is It Safe to Use Heat to Speed up Nail Polish Drying on Wood?
You shouldn’t use heat to speed up nail polish drying on wood. Heat risks causing stains, discoloration, or warping by affecting the wood’s moisture and finish.
It can soften polish unevenly, leading to smears rather than proper drying. Instead, let it air dry naturally or use quick-dry products designed for nail polish.
Can Professional Wood Refinishing Remove Stubborn Nail Polish Stains?
You might wonder if stubborn nail polish stains can truly vanish. Yes, professional wood refinishing can remove even deeply embedded nail polish that DIY methods can’t touch.
Experts strip away the damaged finish layers using chemical strippers and fine abrasives, then sand and refinish the surface meticulously.
While it’s time-consuming and requires skill, this method restores wood to its original beauty, erasing stains without damaging delicate details or the wood itself.
Are There Specific Wood Finishes More Resistant to Nail Polish Stains?
You’ll find oil and water-based polyurethane finishes offer the best resistance to nail polish stains because they withstand acetone and other solvents well.
Varnish and lacquer are less resistant, so stains penetrate easier. Shellac has moderate resistance but can be damaged by alcohol-based removers.
Unfinished or soft wax finishes absorb polish quickly, causing deeper stains. Choosing hard, dense woods sealed with durable finishes gives you stronger protection against nail polish damage.
Preserve the Beauty: Finish Strong with Care
Just like a skilled artisan restores a cherished antique, you can carefully remove nail polish from wood without harm.
By acting quickly, choosing safe solvents, and testing methods first, you’ll preserve your wood’s natural beauty. Remember, patience and the right approach protect your surfaces and keep them looking flawless.
With these steps, you’re not just cleaning—you’re maintaining a timeless finish that lasts, much like a well-kept heirloom.