Best Way to Clean White Cabinets: Step-by-Step Cleaning Guide
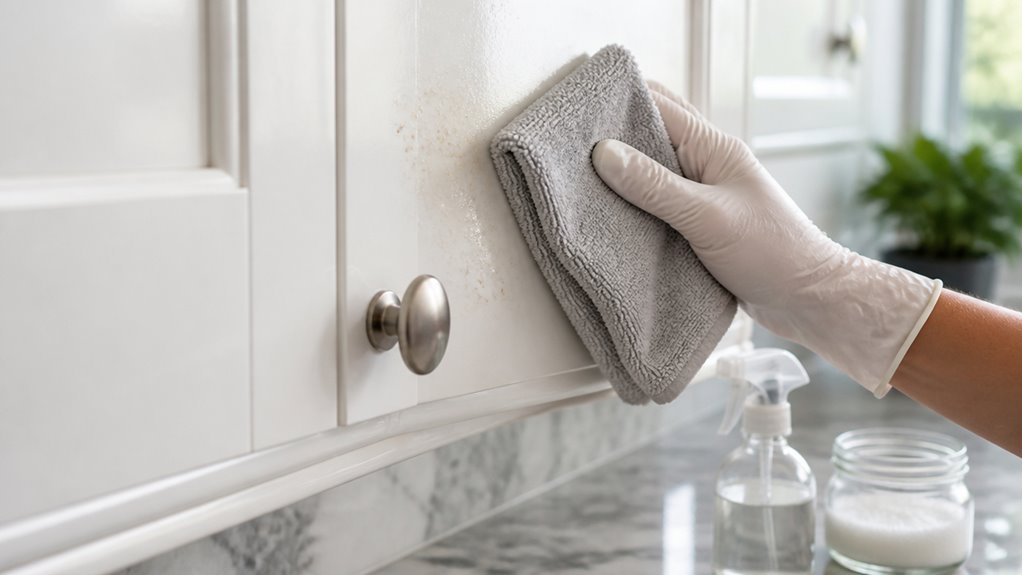
To keep your white cabinets spotless, dust weekly using a dry or slightly damp microfiber cloth, focusing on faces and handles.
For routine cleaning, use a mild soap solution applied with a soft cloth, avoiding excess moisture.
For stubborn grease, try a diluted vinegar mixture. Stubborn stains respond well to a baking soda paste applied gently.
Always dry cabinets promptly to prevent damage, spot test cleaners first, and avoid harsh scrubbing or abrasive products.
More detailed tips will help you maintain their bright, fresh look longer.
Key Takeaways
- Use a damp, lint-free microfiber cloth weekly to remove dust and fingerprints, focusing on handles and edges where grime accumulates most.
- Clean with a mild soap solution of one part dish soap to two parts warm water, applied with a soft cloth and rinsed immediately.
- For stubborn grease or stains, use a 50/50 white vinegar and water mix, testing first on a hidden spot to avoid finish damage.
- Avoid ammonia-based cleaners, magic erasers, and stiff brushes to prevent discoloration, abrasion, and surface damage.
- Always dry cabinets immediately with a clean microfiber cloth, patting gently to prevent moisture damage and warping.
How to Dust and Wipe Down White Cabinets Every Week?

Regularly dusting and wiping down your white cabinets is essential to keep them looking fresh and prevent buildup of grime.
Use a dry or lightly damp microfiber cloth weekly to remove dust, fingerprints, and smudges.
Wipe weekly with a dry or slightly damp microfiber cloth to gently clear dust and smudges.
Keep the cloth damp, not wet, to protect the finish and seams from water damage.
Start cleaning at the top and work downward to avoid streaks and prevent redistributing dirt.
Change to a clean cloth for each pass to guarantee you’re not spreading grime around.
Focus on cabinet faces and handles, where dust and oils accumulate most.
This routine maintenance not only preserves your cabinets’ appearance but also reduces the need for harsher cleaning methods later.
Maintaining this practice ensures the cabinetry’s longevity and pristine look.
For best results, use a lint-free microfiber cloth to avoid scratches and streaks on cabinet surfaces.
Mix and Use Mild Soap Solutions for White Cabinets
To clean your white cabinets, start by mixing one part mild dish soap with two parts warm water. This creates a gentle yet effective cleaning solution.
When you’re ready to clean, grab a soft sponge or a microfiber cloth. Make sure to apply the solution gently; you want to avoid scratching those delicate finishes.
After you’ve wiped down the cabinets, don’t forget to rinse with a clean, damp cloth. This step is super important to get rid of any soap residue.
And remember, drying immediately is key to preventing streaks and moisture damage. Happy cleaning!
For ongoing maintenance, consider using plant-based cleaners to keep your cabinets spotless and safe for your home.
Soap Solution Ratios
Prepare a gentle cleaning solution by combining one part mild dish soap with two parts warm water. This ratio balances effective grease removal with protection for your cabinet finish.
Use a soft sponge or microfiber cloth to apply the solution. Never spray it directly to avoid excess moisture seeping into seams. Keep the cloth damp, not soaked, to prevent damage.
For heavier grease, you can adjust the ratio slightly, but avoid increasing soap concentration too much as it may leave residue. Always rinse with a clean, damp cloth to remove any soap film.
Then dry immediately with a microfiber towel to prevent streaks and moisture damage. Sticking to these precise ratios guarantees thorough cleaning without compromising your white cabinets’ appearance or integrity.
To protect surfaces and prevent moisture damage, it is important to dry thoroughly after cleaning.
Gentle Cleaning Techniques
Maintaining the pristine look of your white cabinets starts with using a mild soap solution applied carefully to avoid damage. Mix one part mild dish soap with two parts warm water. Then apply the solution with a soft sponge or microfiber cloth, never spray directly.
Clean gently to remove grease without harming finishes. After washing, rinse with a damp cloth and dry immediately to prevent streaks and moisture damage.
Key tips for gentle cleaning include:
- Use a damp, not wet, cloth to protect cabinet seams.
- Clean from top to bottom to avoid streaking.
- Use a fresh cloth for each pass to prevent grime spread.
- Focus on handles and edges where grease builds up most.
This method keeps your cabinets spotless while preserving their finish. For regular maintenance, consider using a residue-free polish designed to protect and brighten finished wood surfaces without leaving oily buildup.
Use Vinegar-Based Cleaners on White Cabinets for Tough Grease
To tackle tough grease on your white cabinets, try mixing up a simple solution of equal parts white vinegar and warm water. It’s super effective!
Just remember, instead of spraying it directly on the cabinets, wet your cloth with the vinegar mix. This little trick helps protect the finish.
Oh, and before you dive in, it’s a good idea to test the solution on a hidden spot first. That way, you can be sure it won’t damage your cabinet’s surface.
Better safe than sorry, right?
Regular maintenance using vinegar-based cleaners can help prevent buildup and keep your cabinets looking fresh by breaking down grease and grime effectively.
Vinegar Solution Preparation
Tackle tough grease on your white cabinets by creating a vinegar-based cleaning solution that’s both effective and gentle. Start with a simple 50/50 mix of white vinegar and warm water to break down stubborn residue without harming finishes.
For extra stain-fighting power, add a tablespoon of baking soda to this mixture. Always wet your cloth with the solution instead of spraying directly, protecting your cabinet surfaces from excess moisture.
Use equal parts white vinegar and warm water for a balanced cleaner. Add baking soda for enhanced grease and stain removal.
Apply the solution with a damp cloth, never spray directly. Test the solution on a hidden spot to confirm finish compatibility.
This method offers a reliable, natural way to tackle grease without harsh chemicals. For best results, ensure proper ventilation when using vinegar-based cleaners to avoid irritation from vinegar fumes.
Application Tips and Precautions
When using vinegar-based cleaners on your white cabinets, dampen your cloth with the solution rather than spraying directly. This prevents excess moisture from seeping into seams or damaging finishes.
Always test the vinegar mix on a hidden spot first to ensure your cabinet finish can tolerate it. Apply the cloth gently, focusing on greasy areas near stoves and handles.
Avoid soaking the surface, as vinegar’s acidity can weaken paint or laminate if overused. After cleaning, wipe cabinets with a clean, damp cloth to remove residue.
Then dry thoroughly with a microfiber towel to prevent warping or streaks. Use vinegar-based cleaners sparingly and never on delicate or ammonia-sensitive finishes to maintain your cabinets’ pristine look.
For routine upkeep, consider performing weekly maintenance cleaning to minimize buildup and protect your cabinet surfaces.
Apply Baking Soda Paste to White Cabinets for Stubborn Stains
Apply a thick baking soda paste to stubborn stains on your white cabinets to lift grime that mild soap or vinegar can’t remove.
Mix three parts baking soda with one part water to form a paste. Apply it with a soft cloth, rubbing gently in small circular motions.
Combine baking soda and water, then gently rub the paste onto stains using a soft cloth in circular motions.
Let the paste sit for about 10 minutes to break down the stain before wiping clean.
Keep these tips in mind when using baking soda paste:
- Use only on tough stains resistant to other cleaners.
- Avoid abrasive scrubbing to protect finishes.
- Test on a hidden area first to make certain finish compatibility.
- Rinse off thoroughly to prevent residue buildup.
This targeted method restores cabinet brightness without harsh chemicals or damage. For more challenging cleaning tasks on exterior surfaces, consider using concentrated cleaners compatible with pressure washers to enhance effectiveness.
Clean Scuffs, Corners, and Hardware on White Cabinets
Address scuff marks on your white cabinets using a soft eraser to gently lift surface blemishes without harming the finish.
For corners, edges, and grooves, use a soft-bristled toothbrush to remove accumulated grease and dirt effectively.
Avoid stiff-bristled brushes or abrasive pads, as they can damage delicate surfaces.
When cleaning hardware like handles and pulls, apply the same mild dish soap solution you use on cabinet faces with a soft cloth.
Ensure you remove grime without scratching. Pay special attention to edges and corners, where buildup tends to be heaviest.
Regularly targeting these areas maintains your cabinets’ pristine look while preventing grime from embedding deeply.
This precise approach preserves your cabinet finish, extending its lifespan and keeping your kitchen looking fresh.
For best results, use a soft-bristled toothbrush to gently scrub crevices and hard-to-reach spots without damaging surfaces.
Dry White Cabinets Properly to Prevent Damage
Ensuring your white cabinets are thoroughly dried after cleaning is essential to prevent warping, swelling, or seam damage, especially on laminate and thermofoil surfaces.
Thoroughly drying white cabinets after cleaning prevents warping, swelling, and seam damage on delicate surfaces.
Moisture left on the surface can seep into edges and cause permanent damage. To protect your cabinets, dry them immediately with a clean microfiber towel, which absorbs moisture without scratching.
Avoid air-drying, as it prolongs exposure to water. Also, pay close attention to corners and seams where water tends to accumulate.
Here’s how to dry your white cabinets properly:
- Use a soft, clean microfiber cloth dedicated solely to drying.
- Wipe down all surfaces immediately after cleaning to eliminate residual moisture.
- Gently pat rather than rub to avoid damaging delicate finishes.
- Check cabinet edges and corners carefully for trapped water and dry thoroughly.
Proper moisture management, including using thoroughly wrung-out cloths and avoiding soaking, is crucial to prevent moisture damage to your cabinets.
Spot Test and Follow Safety Tips for White Cabinets
Before using any cleaning solution on your white cabinets, you should always perform a spot test in an inconspicuous area. This helps you verify that the cleaner won’t damage or discolor the finish.
Apply a small amount of your chosen solution, wait a few minutes, then check for any changes in color, texture, or sheen. If you notice any adverse effects, avoid using that cleaner on the entire surface.
Always use gentle cleaning tools like microfiber cloths or soft sponges to protect your cabinets. Avoid soaking the surface, as excess moisture can cause warping or seam damage.
Work in well-ventilated spaces and wear gloves if using solutions with vinegar or baking soda to protect your skin. Following these safety steps preserves your white cabinets’ appearance and longevity.
Avoid These Cleaners and Methods on White Cabinets
Although it might be tempting to reach for powerful cleaners, you should avoid ammonia-based products, magic erasers, and antimicrobial wipes on painted white cabinets. These can damage the finish or leave a gummy residue.
These harsh methods might seem effective but often cause more harm than good.
Steer clear of:
Ammonia-based cleaners that can dull or discolor paint.
Magic erasers, which abrade and weaken cabinet surfaces.
Antimicrobial wipes that leave sticky residues.
Stiff scrub brushes or pads that scratch finishes.
Instead, opt for gentle cleaning solutions and tools to preserve your cabinets’ appearance and longevity.
Using improper cleaners risks warping, staining, or degrading your white cabinet finish. This can lead to costly repairs or refinishing.
Always prioritize gentle, tested methods for safe, effective cleaning.
Frequently Asked Questions
Can I Use Bleach to Whiten White Cabinets?
You shouldn’t use bleach to whiten white cabinets because it can damage the finish and cause discoloration or warping, especially on painted or laminate surfaces.
Instead, try gentler methods like mild soap or vinegar solutions for cleaning and 3% hydrogen peroxide for lightening yellowed grime, but always spot test first.
Bleach is too harsh and risks ruining your cabinets’ appearance and integrity over time.
How Often Should I Repaint or Refinish White Cabinets?
Think of your cabinets as a canvas that wears over time. You should repaint or refinish white cabinets every 7 to 10 years, depending on wear and tear.
If you notice peeling, chipping, or persistent stains that cleaning won’t fix, it’s time to refresh. High-traffic kitchens might need attention sooner.
Regular maintenance extends their life, but when the finish fades or damages, refinishing restores their original brilliance and protects your investment.
Are There Special Cleaners for Wood Versus Laminate White Cabinets?
Yes, you should choose cleaners based on your cabinet material.
For wood cabinets, use mild soap and water or vinegar solutions, avoiding harsh chemicals that can damage the finish and dry out wood.
Laminate cabinets tolerate mild soap and water too, but avoid excess moisture to prevent warping.
Never use ammonia-based or abrasive cleaners on either type, as they damage finishes.
Always test cleaners on a hidden spot first to confirm safety and effectiveness.
Can Sunlight Cause White Cabinets to Yellow Over Time?
They say, “Time and tide wait for no man,” and sunlight is no exception. It can cause white cabinets to yellow over time.
UV rays break down the paint or finish, accelerating discoloration, especially on painted surfaces.
To protect your cabinets, limit direct sunlight exposure using curtains or UV-protective window films. Regular cleaning helps, but preventing prolonged sunlight contact is key to keeping your white cabinets looking fresh and bright.
What Is the Best Way to Prevent Mold in Kitchen Cabinets?
To prevent mold in kitchen cabinets, you need to keep the area dry and well-ventilated.
Avoid moisture buildup by fixing leaks promptly and using a dehumidifier if needed.
Clean cabinets regularly with a mild soap solution and dry surfaces immediately to prevent standing water.
Also, make sure cabinet doors aren’t tightly sealed to allow air circulation.
Using moisture absorbers like silica gel packs inside cabinets can further reduce mold risk.
Simple White Cabinet Cleaning Tips for a Brighter Kitchen
You might think cleaning white cabinets is a hassle, but with simple weekly dusting and mild soap solutions, it’s quick and effective.
Tackling tough grease with vinegar or stubborn stains with baking soda paste keeps them spotless without harsh chemicals.
Just remember to spot test and avoid abrasive cleaners to protect your finish.
Follow these steps, and your white cabinets will stay bright and beautiful with minimal effort, making your kitchen look fresh all year round.