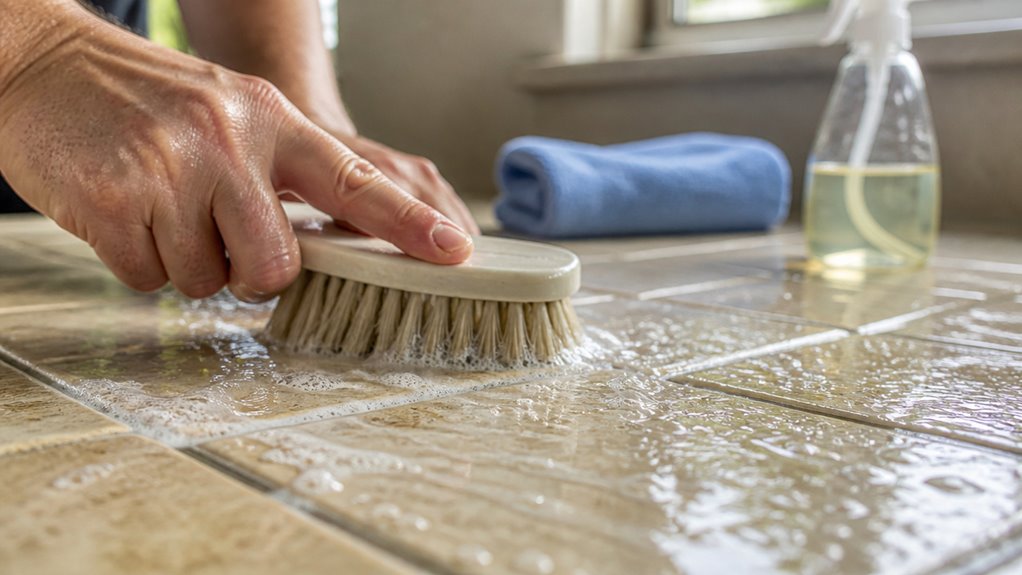
Best Way to Clean a Tile Floor With Grout: Easy Guide
To clean a tile floor with grout effectively, start by sweeping or vacuuming to remove debris.
Then divide the floor into small sections.
Apply a grout-specific cleaner directly on grout lines, letting it soak for 5 to 15 minutes to soften dirt.
Scrub gently using a stiff nylon brush, rinse thoroughly with clean water, and dry completely.
Finish by applying a grout sealer to protect against stains and moisture.
Discover precise tools and maintenance tips to keep your grout spotless longer.
Key Takeaways
- Thoroughly remove loose debris by sweeping or vacuuming before cleaning grout to prevent scratching and improve cleaner effectiveness.
- Work in small sections, applying cleaner directly to grout lines and allowing 5 to 15 minutes dwell time before scrubbing.
- Use a stiff nylon brush or toothbrush to scrub grout gently without damaging tiles, applying firm pressure or circular motions.
- Rinse grout thoroughly with clean water after scrubbing to remove residue, then dry completely with a microfiber cloth or towel.
- After cleaning, apply grout sealer and allow it to cure 24 to 48 hours to protect grout from moisture and stains.
Quick Guide: Basic Steps for Cleaning Grout

Before you begin cleaning grout, make sure to remove all loose debris by sweeping, vacuuming, or dry mopping the tile floor thoroughly.
Remove all loose debris by sweeping, vacuuming, or dry mopping before cleaning grout for best results.
Start in the farthest corner from your exit to avoid walking over cleaned areas. Work in small, manageable sections to prevent the cleaner from drying before scrubbing.
For dusty floors, use a damp microfiber mop to lift fine particles from both tile and grout. Removing grit first is essential; it prevents scratching and allows the cleaner to contact grout more effectively.
Choose a cleaning solution suitable for your grout type and soil level. Apply it directly to grout lines and allow it to dwell for the recommended time.
This methodical prep and debris removal set the stage for successful grout cleaning.
Regular maintenance with tools like microfiber cloths helps prevent buildup and keeps grout cleaner longer.
How to Prepare Your Tile Floor for Grout Cleaning?
To kick things off, you’ll want to get rid of any loose debris. Grab a broom, vacuum, or a dry mop to make sure the surface is clean. This will help prevent any scratches while you’re cleaning.
Now, let’s talk about how to tackle the space. It’s best to work in small sections, starting from the corner that’s farthest from the exit. That way, you won’t accidentally walk over areas you just cleaned.
For the best results, consider using a stiff-bristled brush to scrub the grout effectively without damaging the tiles.
Remove Loose Debris
Begin by thoroughly removing all loose debris from your tile floor to guarantee effective grout cleaning. Start at the farthest corner from the exit to avoid walking over cleaned areas.
Use a broom, vacuum, or dry mop to lift grit and dust, preventing scratches during scrubbing. For dusty floors, a damp microfiber mop helps capture fine particles clinging to tile and grout.
Removing this debris guarantees your cleaning solution contacts grout lines directly, improving results and reducing wear on tile surfaces.
Feel the satisfaction of a pristine surface ready for deep cleaning.
Avoid frustration from dragging dirt or scratching tiles.
Enjoy the confidence that no debris blocks grout cleaning.
Experience smoother scrubbing without obstacles.
See the immediate difference in grout cleaner effectiveness.
Vacuuming or sweeping beforehand also prevents residue buildup, ensuring a cleaner and more efficient grout cleaning process.
Section Floor Strategically
With loose debris cleared away, you can now divide your tile floor into manageable sections to maximize cleaning efficiency.
Start at the farthest corner from the exit to avoid walking over cleaned areas. Mark off sections roughly 3×3 feet or a size you can comfortably clean before the solution dries.
This helps you focus your attention and prevents grout cleaners from evaporating too soon, which reduces effectiveness. Work methodically, completing one section fully: applying cleaner, letting it dwell, scrubbing, rinsing, and drying before moving on.
Keeping the grout wet during dwell time is essential, so smaller sections guarantee thorough cleaning. This strategic approach minimizes missed spots and optimizes your effort, resulting in a consistently clean tile floor and grout throughout the entire space.
Ensure you rinse thoroughly after scrubbing to prevent residue buildup that can cause haze and reduce tile shine.
How to Choose the Best Cleaner for Grout Lines?
Choosing the right cleaner for your grout lines can feel a bit overwhelming, but it doesn’t have to be!
Start by thinking about how dirty your grout is and what type of grout you have. You want a cleaner that’s effective but also safe to use.
For your everyday cleaning, you can’t go wrong with a simple solution of warm water and dish detergent. It’s gentle yet effective for routine maintenance.
But if you’re dealing with tougher stains, you might want to reach for stronger commercial products or even whip up a DIY paste. Just make sure to read the labels and follow the instructions carefully, especially when it comes to using things like bleach or peroxide. Safety first, right? Plus, you want to keep your flooring in good shape!
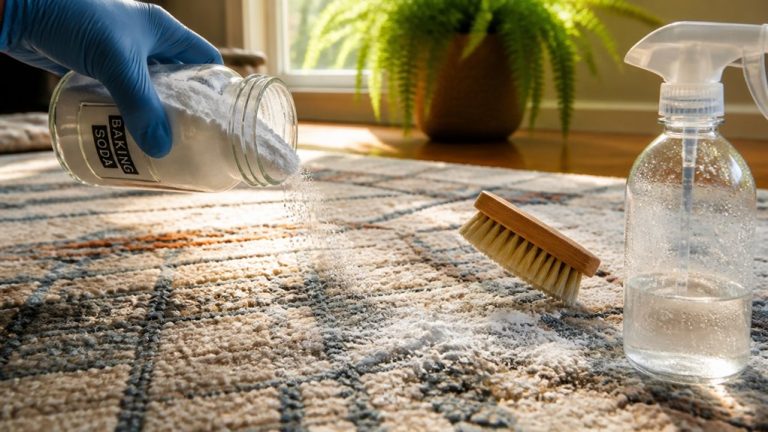
For stubborn grout stains, a baking soda and hydrogen peroxide paste can be very effective and is gentle on grout, making it a great material-specific cleaner to try.
Cleaning Solution Options
Although many cleaning solutions are available, selecting the right one for grout lines depends on the level of soil, grout type, and your cleaning goals. You’ll want a methodical approach to match your needs precisely.
For routine cleaning, warm water with mild dish detergent works gently without damage. For embedded dirt, baking soda paste or commercial grout cleaners provide stronger action. Hydrogen peroxide or oxygen-based bleach helps with stains, but use chlorine bleach cautiously for tough grime. It requires gloves and good ventilation.
Consider these options carefully to protect grout and achieve lasting cleanliness:
- Gentle cleansers prevent grout erosion and discoloration.
- Stronger solutions tackle stubborn stains effectively.
- DIY pastes offer economical, natural alternatives.
- Commercial products deliver consistent, proven results.
- Safety precautions safeguard you during use.
Using products with a clinging gel formula can enhance cleaning effectiveness by ensuring prolonged contact with grout surfaces for deeper stain removal.
DIY Versus Commercial
When deciding how to tackle grout cleaning, weighing the pros and cons of DIY versus commercial cleaners can help you choose the best option for your specific needs.
DIY methods like baking soda paste or mild detergent offer control over ingredients and cost savings. They’re ideal for routine cleaning or light stains.
Commercial grout cleaners, formulated for tougher buildup, provide targeted effectiveness when used as directed. However, they often contain stronger chemicals.
You’ll want to take into account the grout’s condition. Light soil favors gentle DIY solutions, while embedded dirt may require commercial products.
Application precision matters too: apply directly to grout lines and allow proper dwell time.
Ultimately, your choice depends on soil severity, desired cleaning strength, and convenience. Align your approach with the grout’s condition and your comfort level.
Regular cleaning every 3 to 6 months, or more frequently in high-traffic areas, helps maintain grout appearance and prevents mold and mildew buildup.
Safety and Handling
Selecting the best cleaner for grout lines involves more than just effectiveness. It requires careful attention to safety and proper handling.
You need to protect yourself and your surfaces while making certain the cleaner works efficiently. Always read product labels for instructions and warnings.
Avoid harsh chemicals like chlorine bleach unless you’re prepared to use gloves and ventilate the area well.
Keep these safety tips in mind when choosing and using grout cleaners:
- Use gloves to prevent skin irritation from strong cleaners.
- Ensure good ventilation to avoid inhaling fumes.
- Test cleaners on a small, inconspicuous area first.
- Avoid mixing chemicals, which can create dangerous reactions.
- Store cleaners safely out of reach of children and pets.
Consider using formulations that are VOC-free and odorless to reduce environmental impact and minimize harmful fumes during cleaning.
Effective DIY and Commercial Grout Cleaning Methods
Explore a range of effective DIY and commercial grout cleaning methods to restore your tile floor with precision.
Begin with a gentle solution of warm water and mild dish detergent for routine cleaning.
For tougher stains, create a baking soda paste mixed with hydrogen peroxide or oxygen-based bleach to target embedded soil.
Commercial grout cleaners offer stronger formulas; always follow label instructions for dilution and safety.
Avoid harsh chemicals like chlorine bleach unless necessary, and use protective gloves.
Apply cleaning agents directly to grout lines to focus treatment and prevent excessive wetting of tiles.
Use a stiff nylon brush or old toothbrush for scrubbing, applying firm pressure along grout lines.
These methods, combined with proper surface prep and rinsing, enable you to effectively lift dirt and restore grout without damaging tiles.
For chemical-free sanitation and germ reduction, consider using a steam mop designed specifically for tile floors.
How to Apply Grout Cleaner and Let It Soak?
After choosing the right grout cleaner and preparing your surface, focus on applying the solution directly to the grout lines for maximum effectiveness.
Use a small brush or squeeze bottle to target grout without saturating the surrounding tile. Apply evenly and avoid puddling.
Let the cleaner soak to loosen embedded dirt and stains. The dwell time varies, typically 5 to 15 minutes, depending on product instructions and soil level.
Keep grout moist during this period to enhance cleaning power.
Remember to:
- Work in manageable sections to prevent premature drying.
- Avoid spreading cleaner on tiles unnecessarily.
- Follow label directions for dwell time precisely.
- Monitor grout to stay damp without flooding.
- Prepare for scrubbing once soaking completes.
This approach guarantees deep soil penetration for a thorough clean.
For best results, use pH-neutral cleaners specifically formulated for stone and grout to avoid damage and maintain surface integrity during cleaning pH-neutral cleaners.
Best Scrubbing Techniques for Grout Lines
Grab a stiff-bristle brush or an old toothbrush to tackle the grout lines effectively. Focus on scrubbing along the grout’s length instead of across, as this lifts dirt from recessed areas more efficiently.
Apply firm pressure but avoid metal brushes to prevent scratching. You can also use a circular motion to agitate stubborn buildup. Work in manageable sections to keep the grout damp and the cleaner active.
Be thorough but controlled, guaranteeing you cover each grout line without spreading dirt to adjacent tiles. Scrubbing right after the cleaner’s dwell time optimizes soil removal.
Repeat as needed on heavily soiled spots, but avoid excessive force that could damage the grout’s surface. This methodical approach guarantees a deeper, more even clean.
How to Rinse and Dry After Grout Cleaning?
Once you’ve thoroughly scrubbed the grout lines to lift stubborn dirt, the next step is to remove all cleaner residue and loosened soil through careful rinsing.
Use clean water and change it often to avoid redistributing grime. Wipe the floor with a damp microfiber cloth or mop to catch any lingering residue.
Finally, dry the tile surface completely with a clean towel or microfiber pad to prevent water spots and new dirt buildup.
Leaving residue behind can attract more soil, undoing your hard work.
Feel the satisfaction of a spotless floor, free from dirt and cleaner traces.
Notice how the grout regains its original brightness, enhancing your room’s appeal.
Appreciate the smooth, residue-free tile surface underfoot.
Enjoy the fresh, clean scent after thorough rinsing.
Take pride in your meticulous cleaning routine’s lasting results.
Routine Tips to Maintain Clean, Stain-Free Grout
Regularly sweeping or vacuuming your tile floor is essential to prevent dirt and grit from settling into grout lines and causing stains.
Focus on removing loose debris before any wet cleaning to reduce grout abrasion.
After spot-cleaning grout, mop the floor with warm water and a mild detergent to clear residual soil or baking soda paste.
Use a damp microfiber mop for light dust and follow a consistent schedule to avoid buildup.
Avoid harsh scrubbing frequently; instead, steam clean grout periodically for maintenance without damage.
Always work in small sections to guarantee thorough cleaning.
Keeping grout clean before heavy soil embeds will save time and effort later.
Why and How to Seal Grout After Cleaning?
Maintaining clean grout through routine care helps prevent stubborn stains. Sealing your grout after cleaning adds a protective layer that keeps dirt and moisture at bay.
After thoroughly cleaning and drying the grout, apply a high-quality grout sealer evenly using a small brush or applicator bottle. Focus on creating a thin, uniform coat without saturating. Let it penetrate for the recommended time, usually 5 to 15 minutes.
Then wipe off excess sealer to avoid residue buildup. Allow full curing, typically 24 to 48 hours, before foot traffic.
Sealing grout helps you protect against staining and discoloration. It repels water to prevent mildew and mold.
It extends grout longevity and reduces repairs. Sealing also simplifies future cleaning efforts. Lastly, it helps maintain a fresh, polished appearance longer.
Frequently Asked Questions
Can Grout Cleaning Damage My Tile Floor?
Grout cleaning won’t damage your tile floor if you use the right methods.
Avoid harsh chemicals like undiluted bleach and metal brushes, which can scratch or discolor tiles.
Instead, choose mild cleaners, apply them carefully, and scrub grout lines gently with nylon or stiff-bristle brushes.
Always rinse thoroughly to remove residue.
Taking these precautions guarantees you clean grout effectively without harming your tile’s surface or finish.
How Often Should Grout Be Professionally Cleaned?
Think of grout like the mortar holding bricks together. It needs regular care to stay strong.
You should have grout professionally cleaned every 1 to 2 years, depending on foot traffic and exposure to dirt. High-traffic areas might demand annual cleaning, while less-used spaces can stretch to two years.
Regular inspections help you spot when the grout’s appearance dulls or stains. This signals it’s time for a professional deep clean to maintain its durability and look.
Are Steam Cleaners Safe for All Tile Types?
Steam cleaners aren’t safe for all tile types. You should avoid using steam on unglazed, natural stone tiles like slate, marble, or travertine because high heat and moisture can damage or discolor them.
For glazed ceramic or porcelain tiles, steam cleaning is generally safe and effective. Always check your tile manufacturer’s guidelines before using steam to prevent warping or weakening grout and tile surfaces.
Test a small area first to make certain no adverse effects.
What Causes Grout to Discolor Over Time?
Grout discolors over time like a white shirt catching coffee stains. It soaks up dirt, oils, and spills.
You’ll find that frequent foot traffic grinds in grit, while moisture invites mold and mildew to set up camp.
Harsh cleaners can erode grout’s surface, making it more porous and prone to staining.
To keep grout bright, you must tackle these factors methodically. Preventing buildup and sealing grout will help block future discoloration.
Can Grout Cleaning Remove Mold and Mildew Completely?
You can remove mold and mildew from grout effectively with proper cleaning, but complete elimination depends on severity.
Applying a mold-killing cleaner like hydrogen peroxide or oxygen-based bleach, letting it dwell 10–15 minutes, then scrubbing thoroughly with a stiff brush helps break down and lift mold.
Rinse well and dry promptly to prevent regrowth. For deep infestations, multiple treatments or professional remediation might be necessary to fully eradicate mold and mildew.
Cuban Mojo Sauce: Bright, Zesty, and Full of Flavor
Now that you’ve mastered these grout-cleaning steps, your tile floor will shine like a freshly polished gem. Treat grout like a delicate tapestry; clean it gently, scrub with purpose, and seal it like a trusty shield.
With routine care, those grout lines won’t just look spotless; they’ll stand strong against stains and wear. Keep this methodical rhythm, and your floors will tell a story of lasting beauty and meticulous care.