Best Way to Clean Keurig Coffee Maker: Easy & Quick Method
Unplug your Keurig and remove all detachable parts like the water reservoir, K-cup holder, and drip tray. Soak these in hot, soapy water, scrubbing crevices with a soft toothbrush.
Wipe the exterior with a damp microfiber cloth, avoiding moisture near buttons. Descale quarterly by running vinegar through the system, then thoroughly rinse with fresh water cycles.
Dry all components fully before reassembling. Following these steps maintains performance and freshness; explore deeper care practices to optimize your machine further.
Key Takeaways
- Unplug the Keurig and disassemble removable parts like the reservoir, drip tray, and K-cup holder before cleaning.
- Soak removable parts in hot, soapy water for 15 minutes, scrub crevices with a soft toothbrush, then rinse and air dry.
- Wipe the exterior and control buttons weekly with a damp microfiber cloth and treat hard-water buildup using white vinegar.
- Descale quarterly by running white vinegar or commercial solution through brew cycles, letting it rest 30–45 minutes, then rinsing thoroughly.
- After descaling, rinse the reservoir with soapy water, run multiple water-only brew cycles until no vinegar smell remains, dry, and reassemble.
Unplug Your Keurig and Gather Cleaning Supplies

Before you begin cleaning your Keurig, make sure to unplug the machine to avoid any electrical hazards.
Always unplug your Keurig before cleaning to ensure safety around electrical components.
This step guarantees your safety as you handle water and cleaning agents near electrical components.
Next, detach the water reservoir, lid, drip tray, K-cup holder, and filter to prepare for thorough cleaning.
Gather essential supplies: white vinegar for descaling, dish soap for general cleaning, a soft-bristled toothbrush to remove grounds, a microfiber cloth for wiping, and an all-purpose cleaner for exterior shine.
Organize these items within reach to streamline your cleaning process.
Avoid soaking parts at this stage; focus on preparation to maintain machine integrity.
This methodical setup maximizes efficiency and safety before you proceed to remove and soak the parts.
Regular maintenance, including thorough cleaning of removable components, helps prevent buildup and prolongs the machine’s lifespan, similar to routine fabric care.
Take Out and Soak the Removable Parts
Carefully remove the water reservoir, lid, drip tray, K-cup holder, and filter from your Keurig.
Place them in a basin filled with hot, soapy water. Submerge these components fully to loosen coffee oils and residue.
Use a soft brush or sponge to agitate surfaces gently, focusing on crevices in the K-cup holder where grounds accumulate. Let the parts soak for at least 15 minutes to guarantee effective cleaning.
After soaking, rinse thoroughly with warm water to remove soap traces. Dry the exterior of each part with a towel while allowing the water reservoir’s interior to air dry, preventing lint transfer.
Avoid placing non-dishwasher-safe items in the dishwasher unless specified by your model’s manual. This method maintains hygiene and prolongs your Keurig’s lifespan.
Be sure to air dry thoroughly all parts in a well-ventilated area to prevent mold and mildew growth before reassembling your Keurig.
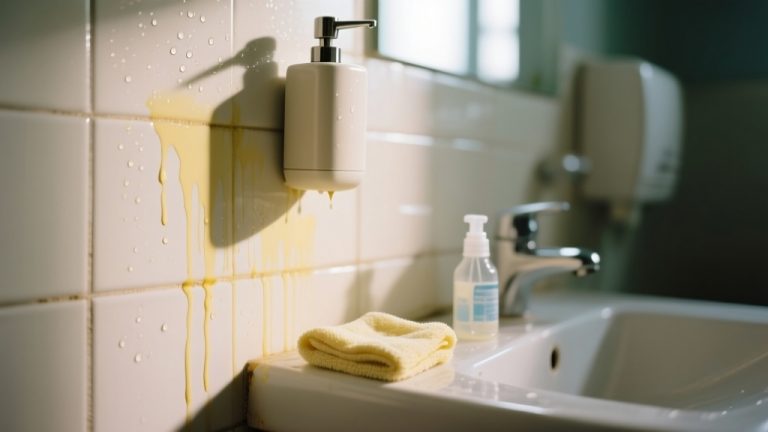
Wipe Down Your Keurig’s Exterior to Remove Residue
To remove residue from your Keurig’s exterior, start by wiping the surface with a damp cloth or sponge.
Focus on areas prone to splatters, coffee grinds, and fingerprints. Carefully clean control buttons and the display screen to avoid moisture damage.
For general grime, apply an all-purpose cleaner on a microfiber cloth and wipe evenly, making certain no cleaner seeps into openings.
For stubborn hard-water buildup, dampen a towel with white vinegar and gently rub the affected spots. Avoid abrasive materials that might scratch the finish.
Once cleaned, buff the entire exterior with a dry microfiber cloth to restore shine and prevent streaks.
Using a non-toxic glass cleaner can ensure effective cleaning without harsh chemicals, keeping your kitchen environment safe and fresh.
This methodical approach guarantees your Keurig looks pristine while maintaining its functional components intact.
Hand Wash and Air Dry Water Reservoir and Replace Filter
When cleaning your Keurig’s water reservoir, start by removing it from the machine and emptying any remaining water. Hand wash the reservoir and lid in warm, soapy water using a soft cloth to avoid scratches. Rinse thoroughly to remove soap residues.
Air dry the reservoir interior completely to prevent lint or mold growth. Next, replace the water filter to maintain optimum water quality and machine performance.
Using a pH-neutral cleaner can help ensure that the reservoir is cleaned safely without damaging the plastic or leaving harmful residues.
| Step | Action |
|---|---|
| 1. Remove & empty | Detach reservoir; discard leftover water |
| 2. Hand wash & rinse | Use warm soapy water; rinse thoroughly |
| 3. Air dry & replace | Let dry fully; insert new water filter |
Following this method guarantees your reservoir stays clean, with filtered water enhancing coffee taste and machine longevity.
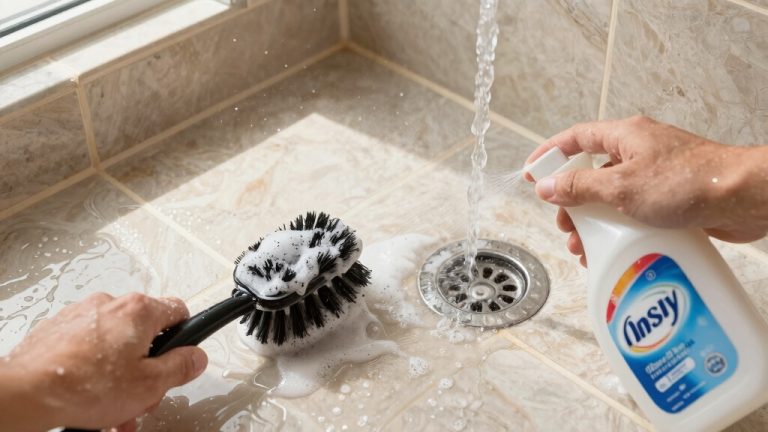
Scrub the Keurig K-Cup Holder and Drip Tray With a Toothbrush
Grab a toothbrush and get ready to tackle the Keurig’s K-cup holder and drip tray, where leftover coffee grounds often accumulate.
First, remove both parts from the machine and soak them in warm, soapy water to loosen debris.
After soaking, use the toothbrush to methodically scrub all surfaces, focusing on corners and crevices where grounds lodge.
Apply gentle pressure to dislodge stuck particles without damaging components.
Rinse thoroughly under running water to remove soap and loosened residue.
Inspect for any remaining buildup and repeat scrubbing if necessary.
Finally, towel dry the exterior surfaces and air dry the interiors completely before reassembling.
Regularly cleaning these parts prevents clogging and guarantees peak brew quality by maintaining smooth water flow through the coffee grounds.
For enhanced cleaning effectiveness, consider using tools with ergonomic handles to reduce hand fatigue during detailed scrubbing.
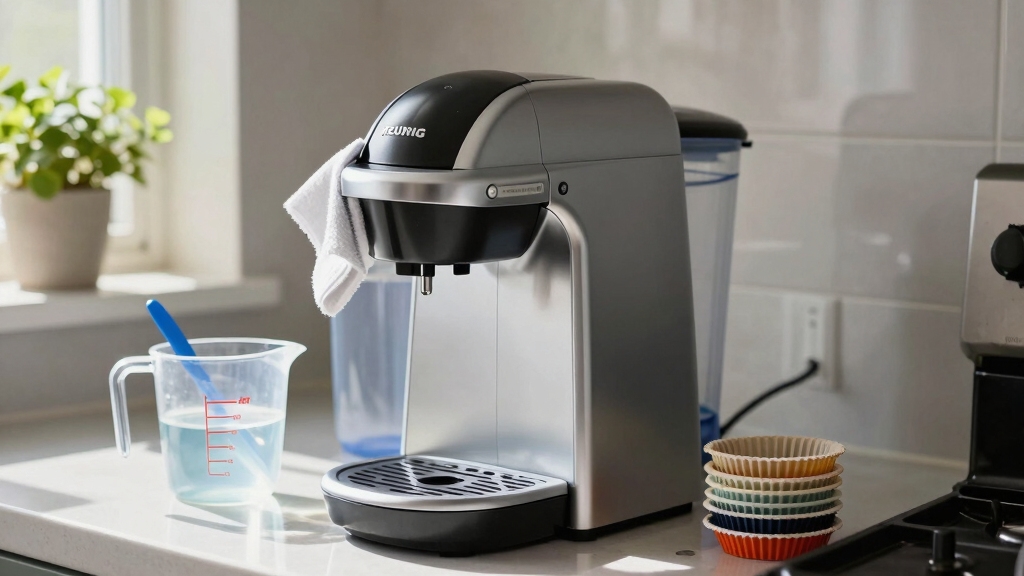
Descale Your Keurig With Vinegar or Solution
Before you kick off the descaling process, make sure to unplug your Keurig and take out all the detachable parts for a good clean and soak. It’s a good idea to get everything prepped first!
Once that’s done, go ahead and fill the water reservoir with either white vinegar or a commercial descaling solution. After that, just run some brew cycles until the reservoir is empty. It’s pretty straightforward!
Finally, don’t forget to do a few rinsing cycles with fresh water. This will help get rid of any leftover residue, ensuring your machine is all set and ready for your next cup of coffee. Happy brewing!
For safety, always ensure proper ventilation when using vinegar or descaling solutions to avoid inhaling fumes.
Preparing For Descaling
Although descaling your Keurig might seem complex, preparing the machine properly guarantees an effective cleaning cycle.
First, unplug the Keurig to assure safety. Remove the water reservoir, lid, drip tray, K-cup holder, and any filters.
Set these parts aside for soaking in hot, soapy water. Gather your supplies: white vinegar or a commercial descaling solution, a large ceramic mug, dish soap, a toothbrush, microfiber cloth, and all-purpose cleaner.
Thoroughly wipe the machine’s exterior to clear debris and fingerprints before descaling. Confirm the water reservoir is empty and clean, then refill it to the maximum fill line with either vinegar or descaling solution.
This precise preparation prevents residue buildup and optimizes the descaling process, setting the stage for effective mineral removal during the cleaning cycle. Using natural ingredients like vinegar is a cost-effective and safer alternative to harsh chemicals, making it ideal for routine maintenance and preventing residue buildup.
Running Descale Cycles
Once you’ve prepared your Keurig, it’s time to run the descale cycles to eliminate mineral deposits effectively.
Fill the water reservoir to the MAX line with either a commercial descaling solution or white vinegar.
Place a large ceramic mug on the drip tray to catch liquid. Select the largest brew size and initiate the cycle.
Repeat until the “ADD WATER” indicator illuminates, signaling the reservoir is empty. Discard the collected liquid after each cycle.
After completing the descale process, allow the machine to rest for 30 to 45 minutes to let the solution break down deposits thoroughly.
Avoid rinsing the reservoir or performing water cycles at this stage; that will be handled later.
Running descale cycles quarterly maintains peak performance and prolongs your Keurig’s lifespan.
When cleaning your Keurig, be sure to wear protective gloves to prevent skin irritation from contact with descaling agents.
Post-Descale Rinsing
After completing the descale cycles and allowing the machine to rest, you need to thoroughly rinse your Keurig to remove any remaining vinegar or descaling solution.
Begin by emptying and washing the water reservoir with warm, soapy water.
Rinse it thoroughly to eliminate residual acids.
Refill the reservoir with fresh water up to the maximum fill line.
Run multiple full brew cycles using the largest cup size to flush out the system.
Discard each brewed water.
Repeat this rinsing process at least 12 times or until no vinegar odor or taste remains.
Finally, reinsert or replace the water filter if applicable, and wipe down the drip tray and K-cup holder.
Ensuring proper rinsing helps prevent residual moisture buildup that can lead to mold growth or odors inside the machine.
Rinse Your Keurig After Descaling
Make sure you run multiple water-only brew cycles to thoroughly rinse out any remaining vinegar or descaling solution from your Keurig.
This step is vital to prevent off-flavors in your coffee and to protect internal components. Follow these precise steps:
- Fill the water reservoir with fresh, clean water to the MAX line.
- Brew using the largest cup size without inserting a K-cup, emptying the brewed water each time.
- Repeat this rinse cycle at least 12 times to guarantee all descaling residue is flushed out.
After completing these steps, empty and wash the reservoir thoroughly before refilling.
This methodical rinsing guarantees your Keurig is free of cleaning agents and ready for daily use. Incorporating a rinse cycle similar to how oxygen-based cleaners thoroughly remove residues ensures your machine stays fresh and functioning properly.
Dry and Reassemble All Parts Before Use
Allow all cleaned parts to air dry completely or use a lint-free cloth to dry them thoroughly before reassembling your Keurig.
Make sure no moisture remains, particularly inside the water reservoir and K-cup holder, to prevent mold growth and electrical issues.
Once dry, carefully reinsert the water filter into the reservoir if applicable.
Align the drip tray and K-cup holder precisely in their designated slots to guarantee proper function and avoid leaks.
Secure the reservoir and lid firmly to maintain stability during operation.
Confirm all parts fit snugly without forcing, as improper assembly can impede brewing cycles or damage components.
Finally, plug in your Keurig only after complete reassembly to ensure safety and readiness for use.
This methodical approach preserves machine integrity and promotes consistent coffee quality.
Keep Your Keurig Clean With Weekly Wipes
To keep your Keurig in top shape, it’s a good idea to give its exterior a wipe-down every week. Just grab a damp microfiber cloth to remove any splatters or fingerprints. It’s quick and easy!
While you’re at it, don’t forget to clean the removable parts like the water reservoir, drip tray, and K-cup holder. A little warm soapy water will do the trick and help prevent any buildup. If you stick to this routine, your machine won’t only stay hygienic but also work efficiently for you. Happy brewing!
Weekly Exterior Wipe
Regularly wiping down the exterior of your Keurig removes coffee splatters, grounds, and fingerprints that accumulate during daily use.
To maintain its pristine condition and guarantee peak functionality, follow these steps weekly:
- Unplug the machine and use a damp microfiber cloth with a mild all-purpose cleaner to wipe the exterior surfaces, including buttons and display screen.
- For stubborn hard-water buildup, apply white vinegar to a cloth and gently treat affected areas, then buff dry with a separate dry microfiber cloth.
- Pay special attention to the drip tray and base, as these areas accumulate the most residue.
Guarantee they’re free from moisture to prevent mold growth.
Consistent weekly exterior wipes preserve your Keurig’s appearance and extend its operational lifespan.
Clean Removable Parts
Remove the water reservoir, lid, drip tray, and K-cup holder from your Keurig for thorough cleaning.
Submerge these removable parts in warm, soapy water to loosen coffee residue and mineral buildup.
Use a soft-bristled toothbrush to meticulously scrub the K-cup holder, focusing on corners and piercing needles where grounds accumulate.
Rinse all parts thoroughly under running water to eliminate soap traces.
Towel dry the exterior surfaces to prevent water spots, then air dry the reservoir interior to avoid lint contamination.
Note that some models allow dishwasher cleaning for the drip tray and K-cup holder; refer to your manual before proceeding.
Regular weekly cleaning of removable parts maintains peak brewing performance and extends your machine’s lifespan by preventing clogs and bacterial growth.
Schedule Quarterly Deep Cleanings to Maintain Freshness
Consistently scheduling deep cleanings every quarter guarantees your Keurig operates at peak performance and maintains ideal taste quality. Regular descaling and thorough cleaning prevent mineral buildup and coffee residue that degrade flavor and machine efficiency.
Follow this precise quarterly deep cleaning protocol:
- Descale: Fill the reservoir with vinegar or descaling solution to MAX. Run brew cycles until empty, repeat twice, then let the machine rest 30-45 minutes.
- Rinse: Perform 12 fresh water brew cycles to flush out residues. Empty and wash the reservoir thoroughly between steps.
- Clean removable parts: Soak and scrub the water reservoir, K-cup holder, drip tray, and lid in hot soapy water. Use a toothbrush for tight areas.
Set calendar reminders to uphold this schedule and make certain your Keurig remains clean, efficient, and delivering fresh coffee every time.
Frequently Asked Questions
Can I Use Bleach Instead of Vinegar for Descaling My Keurig?
No, you shouldn’t use bleach to descale your Keurig.
Bleach can damage the internal components and leave harmful residues that affect taste and safety.
Instead, use white vinegar or a commercial descaling solution designed for coffee makers.
These options effectively remove mineral buildup without risking harm to your machine.
Always follow the manufacturer’s instructions to guarantee proper cleaning and maintain your Keurig’s performance and longevity.
How Do I Fix a Keurig That Won’T Brew After Cleaning?
About 30% of Keurig users face brewing issues post-cleaning.
To fix this, first make certain the machine is fully reassembled and plugged in.
Check water reservoir placement and refill it.
Run several water-only brew cycles to clear any vinegar residue.
Inspect the needle for clogs using a paperclip.
If still unresponsive, reset the machine by unplugging for 5 minutes.
These steps methodically restore brewing functionality.
Is It Safe to Put the Water Reservoir in the Dishwasher?
You can put the water reservoir in the dishwasher only if your Keurig model’s manual explicitly states it’s dishwasher safe.
Many reservoirs aren’t designed for high dishwasher temperatures and may warp or become damaged.
To be safe, hand wash the reservoir with warm soapy water and rinse thoroughly.
Avoid harsh scrubbing or abrasive materials.
Always check your user guide to confirm cleaning instructions to maintain your machine’s longevity and performance.
Can I Use Filtered Water to Reduce Cleaning Frequency?
Want to reduce cleaning frequency? Yes, using filtered water helps minimize mineral buildup inside your machine, which means less frequent descaling.
Filtered water contains fewer impurities and hard minerals, so it slows down scale formation. However, you still need to descale regularly, about four times a year, to maintain peak performance.
Combine filtered water with routine cleaning to keep your Keurig running smoothly and extend its lifespan effectively.
What Should I Do if My Keurig Has Mold Inside?
If your Keurig has mold inside, unplug it immediately.
Remove and soak all removable parts in hot, soapy water, scrubbing with a toothbrush to eliminate mold.
Fill the reservoir halfway with white vinegar and run multiple brew cycles to descale and disinfect internal components. Rinse thoroughly by running several water-only cycles.
Allow parts to air dry completely before reassembling. Repeat this process regularly to prevent mold recurrence and maintain hygiene.
Brew Better Every Time with a Clean Keurig
Keeping your Keurig clean is like tuning a fine instrument. Precision and regular care make sure it performs flawlessly.
By unplugging, soaking, scrubbing, and rinsing each component methodically, you prevent buildup that can affect taste and function.
Don’t forget weekly wipes and quarterly deep cleans to maintain peak freshness. Follow these steps consistently, and your Keurig will continue brewing perfect coffee every time, with the reliability you depend on.