How to Get Wax Out of the Sink? Easy Home Methods That Work
To get wax out of your sink, start by softening the wax with a hairdryer on low heat. Then gently scrape it off using a plastic scraper or spoon to avoid scratches.
Alternatively, chill the wax with ice in a sealed bag to harden it, making it easier to lift. For stubborn residue, try pouring boiling water slowly to melt and flush wax away.
You can also use a baking soda and vinegar fizz to loosen buildup. If you want to prevent future clogs and clean deep inside the drain, there’s more to explore.
Key Takeaways
- Soften wax using a hairdryer or low heat, then gently scrape with a plastic scraper to avoid damaging the sink surface.
- Apply ice packs in a sealed bag over the wax to harden it, then chip away softened wax with a dull plastic spoon.
- Use baking soda and vinegar to fizz and loosen minor wax residues before flushing the drain with hot water.
- Remove wax fragments promptly with paper towels or a vacuum, and disassemble drain parts carefully if wax is deep inside.
- Prevent wax buildup by avoiding pouring melted wax into the drain and using sink mats or candle trays to catch drips.
Tools Needed for Wax Removal
When you’re ready to tackle wax removal from your sink, having the right tools at hand makes the process efficient and thorough.
Start with a plastic spoon or scraper to lift softened wax without damaging the surface. Use paper towels or sink paper to blot liquid wax, preventing spread. Blotting fresh wax immediately helps avoid spreading thin layers and speeds cleanup. Using a scraper with a non-slip handle ensures better grip and control during removal.
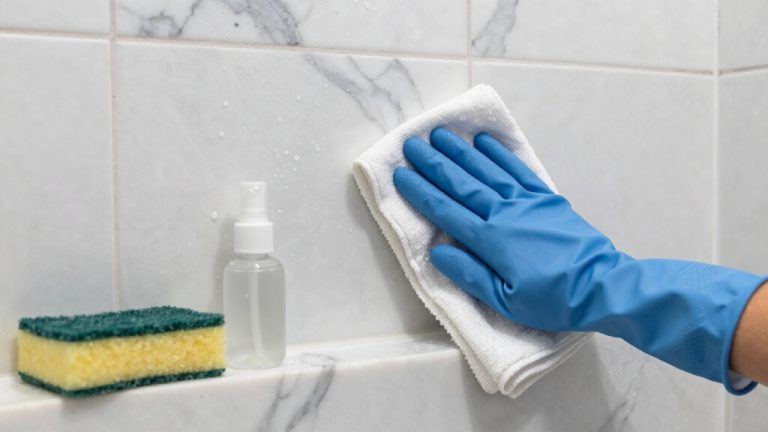
Rubber gloves protect your hands during cleanup, while a trash bag keeps wax waste contained. For stubborn wax, apply heat with a hairdryer or heat gun, then gently scrape with a plastic putty knife.
Ice packs help harden wax for easier removal. An old toothbrush reaches crevices, and a vacuum cleaner with a hose clears loose bits.
Finally, wipe surfaces clean with a microfiber cloth, ensuring no residue remains. These tools prepare you for effective wax removal.
Safe Wax Scraping Techniques
When you’re scraping wax, it’s a good idea to use plastic tools. Metal can scratch your sink, and we definitely want to avoid that!
Just remember to apply gentle pressure when lifting the wax. This way, you can get rid of it without damaging the surface. Wearing protective gear can help prevent irritation during cleanup.
Once you’ve removed the wax, make sure to clean up any residue thoroughly. This helps prevent buildup and keeps your sink looking great. It’s important to avoid pouring hot wax down the drain since it can quickly solidify inside and cause clogs.
Choosing Safe Tools
Although metal tools may seem sturdy, they can easily scratch or damage your sink’s finish. Opt for non-abrasive options like plastic spoons, rigid plastic scrapers, or silicone spatulas with firm edges to safely remove wax without harming surfaces.
Select scrapers designed specifically for household cleaning to improve efficiency and reduce risk. Avoid metal knives or razor blades, especially on porcelain or stainless steel sinks.
Keep a vacuum or hand tool handy to collect loosened wax fragments, preventing scratches from debris. When accessing wax near or inside the drain, remove the sink stopper carefully. Use gloves and eye protection if disassembling plumbing parts to clean wax buildup safely.
Prioritize mechanical removal with safe tools and avoid harsh chemicals or excessive force to protect your sink’s integrity. Because moisture can cause damage if trapped, ensure the surface is thoroughly dried to prevent mold development.
Before starting, ensure the sink is rinsed thoroughly to eliminate large debris and prepare the surface for cleaning initial sink preparation.
Gentle Wax Removal
Since wax can easily damage your sink’s finish if handled improperly, you’ll want to use only plastic spoons or scrapers to lift hardened wax gently.
Avoid metal tools or anything sharp that could scratch or chip the surface. Work incrementally by removing small wax fragments rather than trying to pry off large chunks at once.
Apply gentle pressure to prevent damaging your sink’s finish. As you scrape, collect removed wax pieces immediately with a paper towel or vacuum to avoid re-spreading. Ensuring proper ventilation during the removal process can help reduce any risk of overheating.
Be patient and thorough, focusing on lifting layers carefully. This method safeguards your sink and sets you up for efficient cleanup.
Before attempting to remove wax, ensure the sink surface is clean and dry to avoid interference with the removal process preparation and initial cleaning.
Cleaning Residual Wax
How do you effectively clear leftover wax without damaging your sink? Start by softening the wax with mild heat from a hairdryer on low. Avoid hot water to prevent pushing wax deeper. Choosing a hard, smooth surface for scraping helps minimize damage to the sink finish. Regular inspections and careful maintenance can prevent buildup and protect the surface over time.
Use a plastic or silicone scraper that matches your sink’s curve to gently lift softened wax, working from edges inward. Wipe loosened wax frequently with a soft cloth to prevent smearing.
Finish by cleaning the area with warm, soapy water and buffing with a microfiber cloth to restore shine. Repeat scraping and cleaning cycles as needed, always proceeding cautiously to protect your sink’s finish and plumbing. Maintaining a detailed cleaning log can help track your efforts and improve long-term care.
Using the Heated Wax Method
When you apply controlled heat to wax in your sink, it softens and liquefies, making removal far easier than scraping hardened residue. Use a hair dryer on high heat, held a few inches above the wax.
Once liquefied, blot it immediately with absorbent towels; never rub to avoid smearing or embedding wax. Repeat heating and blotting until clean. Start by scraping off large chunks gently with plastic tools to protect the sink finish.
It is important to keep the heat source moving and avoid concentrating heat in one spot to prevent damage, similar to the gentle steam cleaning technique used on delicate surfaces.
| Step | Tool Needed | Key Tip |
|---|---|---|
| Initial scrape | Plastic scraper | Avoid metal to prevent scratches |
| Heat wax | Hair dryer | Keep dryer a few inches away |
| Blot melted wax | Paper/cotton towels | Rotate towels to fresh spots |
Dispose of wax-soaked towels safely to prevent fire risks.
Applying the Chilled Wax Process
Hey there! So, let’s kick things off by preparing a good amount of ice cubes. You’ll want to pour those down the drain because they really help the wax solidify super quickly.
Once that wax hardens up, you can grab a spoon or some tongs to carefully scrape it away. Just be gentle to avoid damaging your sink, okay? Wax hardens quickly as it cools, sticking inside pipes, so removing it promptly is key. Using appropriate cleaning tools can make the removal process easier and safer for your sink surface.
Preparing Ice Application
Why is chilling the wax essential before removal? It hardens the wax, making it brittle and easier to lift without smearing.
To prepare, grab fresh, solid ice cubes from your freezer and place them in a sturdy, leak-proof sandwich bag. Avoid thin, low-quality bags that might rupture.
Seal the bag tightly to prevent water from contacting the sink. Make sure you have enough ice to fully cover the wax stain. Proper storage in a cool, dry place helps maintain the ice’s effectiveness during application.
Gently place the sealed ice bag directly over the wax, ensuring full contact for even chilling. Leave it for 3 to 5 minutes, checking periodically for brittleness. This ice method procedure is suitable for delicate surfaces to avoid heat damage.
Don’t press down to avoid spreading wax, and never extend ice application beyond 10 minutes to prevent water damage.
Wear gloves to handle the ice and keep the sink dry before starting. Using protective measures helps maintain fabric integrity and prevents accidental damage during cleaning.
Scraping Chilled Wax
Before scraping, verify the wax is fully chilled and hardened to prevent smearing or spreading.
Use a dull plastic scraper or spoon to gently lift wax chunks near the drain opening, starting from the edges. This approach helps avoid abrasive tools that could damage the sink surface.
Avoid metal tools to prevent sink surface damage. Removing the sink stopper improves access for thorough scraping.
Collect wax pieces in a disposable container to avoid re-depositing.
For wax deeper inside the drain, consider using a drain snake with cutting blades matching the pipe diameter. Employing a drain snake can effectively break up or pull out wax deposits.
If needed, shut off water and disassemble the P-trap to manually remove lodged wax with pliers or small scrapers.
Always wear gloves to protect your hands from cold wax and sharp edges.
Repeat scraping carefully until all wax is removed without harming plumbing parts.
Combining Cold Water
Although cold water won’t dissolve wax, applying it effectively chills and hardens wax near the drain, making removal easier. To apply this method, stop running hot water immediately to avoid pushing wax deeper.
Drop ice cubes into the drain and run tap-cold water to cool the wax and surrounding surfaces. Wait several minutes for the wax to harden fully; repeat if necessary.
This process solidifies wax, making it brittle and less sticky, so you can mechanically remove it with a drain snake or scraper. Note that cold water won’t clear wax from deep inside pipes and may not address mixed debris.
Use cold water cautiously to prevent thermal shock and consider external chilling for the P-trap. For stubborn blockages, professional cleaning or P-trap removal may be required.
For efficient cleaning and safety, always follow safety precautions when handling any cleaning process.
Employing the Boiling Water Technique
When you pour boiling water over solid wax in your sink, the high temperature melts the wax enough to loosen its grip on surfaces. This allows it to float or soften for easier removal.
First, poke holes in the wax to let hot water seep underneath. Slowly pour boiling water over the affected area, then wait as the wax melts and rises.
Once cooled, the wax will resolidify on the water surface, forming solid chunks you can scoop out.
Be cautious not to pour boiling water directly down the drain, as it may melt wax inside pipes, causing it to harden deeper and worsen clogs. Use strainers to catch wax pieces and avoid burns by handling water carefully.
Baking Soda and Vinegar Solution for Wax Removal
If you want a natural and safe method to tackle mild wax buildup in your sink, using a baking soda and vinegar solution offers a practical option.
Pour baking soda into the drain, then immediately add an equal amount of vinegar. The mixture fizzes, producing carbon dioxide bubbles that mechanically break up and loosen wax particles. However, it is important to note that this reaction does not generate enough force to clear heavy or stubborn clogs because the system is not sealed and gas escapes easily, limiting pressure buildup.
Pour baking soda followed by vinegar to create fizzing bubbles that gently break down and loosen wax buildup.
Let it bubble for 5 to 10 minutes, then flush with hot water to wash away residues.
This method works best on light wax deposits but isn’t effective against thick, hardened clogs.
For stubborn buildup, repeat the process or combine with mechanical tools.
Baking soda and vinegar are non-toxic, safe for pipes, and environmentally friendly.
This makes them ideal for routine maintenance rather than heavy-duty wax removal.
Cleaning the Drain Assembly and P-Trap
How do you guarantee your sink drain stays clear of stubborn wax buildup? Start by removing the sink stopper or strainer, using pliers if needed, to access the drain assembly.
Clean all visible wax and debris with a soft brush soaked in warm soapy water, paying close attention to rubber gaskets and seals. To maintain clear drains and prevent buildup, it is helpful to use drain strainers and clean them regularly with dish soap and hot water.
Next, place a bucket under the P-trap and carefully loosen its slip nuts to remove it.
Empty and scrub the trap thoroughly with hot water and dish soap, inspecting for damage.
For stubborn clogs, use a plumber’s snake gently to avoid pipe damage.
After cleaning, rinse all parts thoroughly, reassemble, then flush the drain with hot water.
Regular inspection and cleaning prevent wax buildup and maintain smooth drainage.
When to Call a Professional Plumber?
Though DIY methods can handle minor wax clogs, you need to call a professional plumber once your efforts don’t restore proper drainage or when multiple drains show signs of blockage.
Wax hardened inside pipes resists plungers and common drain cleaners, requiring specialized tools and expertise. Consider professional help if you notice:
- Complete water blockage or persistent slow drainage despite your attempts.
- Multiple drains are clogged simultaneously, signaling wax migration through the system.
- Recurring clogs or gurgling noises indicate deep or extensive wax buildup.
Delaying professional service risks pipe damage, corrosion, and property harm. It is important to assess the severity of the clog by checking for signs like overflow or widespread drainage issues before deciding on professional intervention.
Ignoring wax clogs can lead to pipe damage, corrosion, and costly property repairs.
Plumbers use cutting-blade augers, camera inspections, and high-pressure jetting to effectively remove wax and prevent further issues.
Don’t let stubborn wax clogs compromise your plumbing; call a professional promptly.
Tips to Prevent Wax Build-Up in the Sink
Preventing wax buildup in your sink requires proactive steps that minimize wax exposure to your plumbing.
Always use candle holders or trays with deep wells to catch drips and avoid placing candles near sink edges. Never pour melted wax down drains; instead, let it cool and dispose of it in trash bins clearly labeled for wax. Since mineral deposits form when substances dry on surfaces, preventing wax from entering the sink helps avoid stubborn residue.
Educate everyone in your household on these practices to avoid accidental disposal. Protect your sink by placing silicone or rubber mats to catch wax drips and clean them regularly.
Schedule monthly drain maintenance with hot water flushes and baking soda-vinegar treatments to dissolve minor deposits. Regularly inspect drains for slow drainage and keep a log of maintenance to address buildup early.
These measures ensure your plumbing stays clear and functional.
Frequently Asked Questions
Can Wax Damage Different Types of Sink Materials?
Wax won’t damage your sink materials if you use it properly.
Stainless steel, fireclay, ceramic, granite composite, quartz, copper, and natural stone all tolerate wax well.
Wax can fill scratches or enhance finishes but may cause dullness or residue if over-applied.
You just need to remove excess wax with warm soapy water or mild cleaners to prevent buildup.
Is It Safe to Use Chemical Drain Cleaners on Wax Clogs?
Chemical drain cleaners aren’t your wax’s best friend. They’re designed to dissolve organic messes, not stubborn wax.
Using them on wax clogs can be risky; the wax won’t break down easily, and the harsh chemicals might corrode your pipes or damage sink materials.
Instead, opt for gentle heat or mechanical removal methods.
Protect your plumbing and avoid unnecessary hazards by steering clear of chemical cleaners for wax blockages.
How Long Does Wax Typically Take to Harden in a Sink?
Wax typically hardens in a sink within minutes, often immediately upon contact with the cooler surface or cold water.
Thin layers solidify in seconds to a few minutes, while thicker pools take longer but usually harden within an hour.
The sink’s material and water temperature speed this up; metal and cold water cool wax faster.
Once solidified, it adheres firmly and contracts slightly, making removal tricky without reheating or scraping.
Can Leftover Wax Cause Unpleasant Odors in the Sink?
No, leftover wax won’t cause unpleasant odors in your sink.
Wax solidifies without decomposing or supporting bacteria and mold growth, which usually generate smells.
Any foul odors you notice likely come from organic debris, stagnant water, or plumbing issues—not the wax itself.
So, if your sink smells, check for food buildup or drainage problems.
Wax is odorless at room temperature and doesn’t rot or produce gases that cause bad smells.
Are There Eco-Friendly Wax Removal Alternatives?
Yes, you can remove wax eco-friendly by freezing it to harden and easily pop it out.
Then use warm soapy water to dissolve residues. Boiling water softens wax, while baking soda and vinegar fizz away buildup naturally.
Mechanical tools like plungers and brushes help without chemicals.
Avoid harsh solvents; instead, rely on these biodegradable, non-toxic methods to protect your sink, plumbing, and the environment while effectively cleaning wax.
Prevent Future Sink Buildup With Smart Wax-Free Habits
If wax clogs your sink, don’t panic. For example, Sarah heated stubborn wax gently, then wiped it away with ease, avoiding costly repairs.
Following these steps using tools carefully, applying heat or cold, and cleaning the drain keeps your sink clear and functional.
Remember, if you hit a tough clog, calling a professional plumber is wise. With regular care and prevention, you’ll avoid wax build-up and protect your plumbing long-term.