
Best Way to Clean Freezer: Easy Step-by-Step Guide
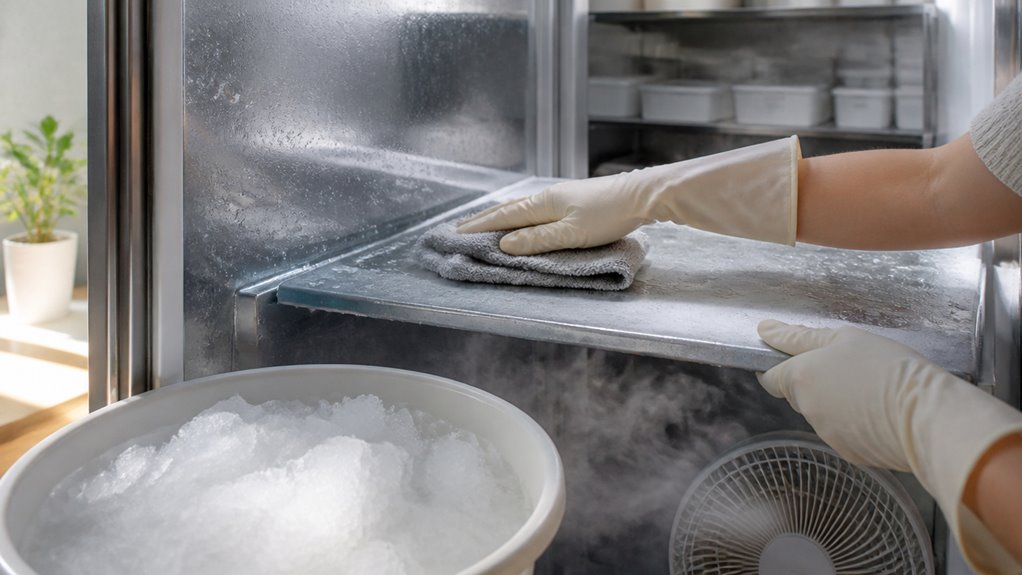
To clean your freezer effectively, start by emptying and grouping food by type. Then unplug the unit.
Remove and thaw glass shelves gradually at room temperature before washing them in warm, soapy water and disinfecting properly.
Vacuum any loose debris inside with gentle attachments. Clean interior surfaces using a vinegar and water solution and avoid harsh chemicals.
Then sanitize with a bleach solution. Dry all parts thoroughly before reassembling and restarting at 0°F.
With systematic care, you’ll guarantee both freshness and efficiency throughout the process.
Key Takeaways
- Empty freezer, transfer food to fridge, and unplug before cleaning to prevent thawing and ensure safety.
- Remove and thaw glass shelves at room temperature; clean gently with warm soapy water and air-dry fully.
- Vacuum loose debris with a handheld vacuum using gentle suction and soft brush attachments to avoid damage.
- Clean interior with a vinegar-water solution, scrub stubborn stains gently, and avoid abrasive tools and harsh chemicals.
- Disinfect with diluted bleach solution, dry thoroughly, and reinstall shelves before plugging in and restocking food.
Prepare Your Freezer: Remove Food and Items

Start by removing all the food from your freezer and transferring it to a refrigerator to prevent thawing during cleaning.
Begin by emptying your freezer, moving all food to the fridge to keep it frozen while you clean.
Next, take out all removable shelves, drawers, and ice cube trays. Allow glass shelves to reach room temperature before cleaning to avoid cracking.
Place ice cube trays aside for separate washing or dishwasher use. Use a handheld vacuum to extract loose debris, crumbs, and trash from corners and crevices thoroughly.
Group food items by type, such as meats, vegetables, and frozen meals, to streamline reorganization later. This methodical preparation minimizes the risk of damage and mess, creating an efficient workflow for the cleaning process.
Ensuring all contents are safely relocated and the interior is free from loose particles sets a solid foundation for the next cleaning steps. Using enzymatic action can be an effective strategy for deep cleaning and odor removal in tough areas.
Thaw and Handle Glass Shelves Safely
Once you’ve cleared out the freezer and removed all loose debris, focus on the glass shelves.
First, allow them to thaw gradually at room temperature to prevent cracking from sudden temperature changes.
Avoid running hot water directly over the shelves while still cold.
Carefully lift each shelf by its edges to avoid dropping or chipping.
Place shelves on a clean, stable surface lined with a soft cloth to protect from scratches.
Inspect for any cracks or damage before cleaning.
Handle each piece gently, especially if they’re heavy or large.
Avoid stacking shelves during thawing to prevent uneven pressure.
Once fully thawed, you’re ready to wash and disinfect them safely.
Taking these steps guarantees your glass shelves remain intact and ready for effective cleaning without risk of damage.
For best cleaning results, use non-abrasive tools to avoid scratching the glass surfaces.
Vacuum Loose Debris Inside the Freezer
When you’re ready to clean out your freezer, pick a handheld vacuum that has gentle suction and a narrow nozzle. This will help you carefully get rid of any loose food particles and debris.
Make sure to pay extra attention to those tricky spots—like corners, crevices, and along the gaskets—where crumbs tend to hide. Just a heads-up: be gentle!
Try to avoid using harsh attachments or applying too much pressure, so you don’t scratch or damage the interior surfaces while you’re vacuuming. Happy cleaning!
For optimal results, choose a vacuum with a compact design and versatile attachments to easily navigate tight freezer spaces and clean thoroughly without hassle.
Choosing The Right Vacuum
When cleaning out your freezer, picking up loose debris efficiently requires the right vacuum. Choose a handheld vacuum with strong suction and a narrow nozzle to reach tight corners and crevices.
Avoid bulky models that can damage delicate parts or struggle in confined spaces. Make certain the vacuum has a washable or replaceable filter to handle fine dust and small particles without clogging.
Opt for a cordless model for easy maneuverability inside the freezer. Before vacuuming, remove shelves and trays to access hidden debris. Use slow, deliberate strokes to avoid scattering dirt.
After vacuuming, clean the vacuum attachments thoroughly to prevent cross-contamination. Selecting the right vacuum guarantees you remove loose debris effectively, setting the stage for the deeper cleaning that follows. For best results, consider vacuums with multi-functionality features such as blower modes to enhance cleaning versatility.
Targeting Food Particles
To effectively vacuum loose debris inside the freezer, start by carefully removing all shelves and trays to expose hidden corners where food particles tend to accumulate.
Use a handheld vacuum with a narrow nozzle attachment to reach tight spaces, including around door seals and beneath removable parts.
Move methodically, working from top to bottom to avoid scattering debris.
Pay close attention to crevices and grooves, where crumbs and ice crystals often lodge.
Empty the vacuum container frequently to maintain suction power.
After vacuuming, inspect the interior for any stubborn particles missed and gently dislodge them with a soft brush before vacuuming again.
This precise approach guarantees you remove all loose debris, preventing odors and buildup, and prepares the freezer for thorough cleaning and sanitizing.
Finally, ensure the interior is thoroughly dried with a microfiber cloth to prevent moisture buildup and maintain optimal appliance performance.
Preventing Damage To Interior
Although vacuuming loose debris inside the freezer is essential, you must take care to prevent damage to the interior surfaces. Use a handheld vacuum with a soft brush attachment to gently remove crumbs and particles without scratching. Avoid metal nozzles or excessive pressure that can harm plastic or painted surfaces.
It is also important to use tools that provide gentle cleaning to avoid wear and tear on delicate interior materials.
| Step | Action | Tip |
|---|---|---|
| 1. Prepare | Unplug freezer, remove food | Prevents accidental activation |
| 2. Select vacuum | Use soft brush attachment | Protects delicate interior parts |
| 3. Vacuum debris | Move nozzle gently | Avoids surface scratches |
| 4. Inspect surface | Check for missed spots | Guarantees thorough cleaning |
Following these steps carefully preserves your freezer’s interior integrity while efficiently removing debris.
Organize Food Items by Type for Repacking
Sort your food items into clear categories before placing them back in the freezer. Group similar items like meats, vegetables, fruits, and pre-cooked meals separately.
Use airtight containers or labeled freezer bags to keep everything sealed and identifiable. This method prevents cross-contamination and helps maintain peak freshness.
Arrange items by frequency of use. Store daily staples within easy reach and less-used products in the back or bottom.
Prioritize placing heavier packages on the bottom to avoid crushing delicate foods. Leave space between groups to allow cold air circulation, ensuring even freezing throughout.
Taking these organized steps makes it easier to locate items quickly. It reduces spoilage and maximizes the freezer’s efficiency.
Repacking thoughtfully sets you up for a more streamlined, safe, and effective freezer experience moving forward.
For maintaining your freezer’s interior, consider using non-toxic cleaning products to keep surfaces safe and free of harsh chemicals.
Clean Interior Surfaces With Natural Vinegar Solutions
Spraying a mixture of equal parts distilled white vinegar and hot water onto the freezer’s interior surfaces offers a natural, effective way to break down grime and neutralize odors.
Start by thoroughly coating the walls, gaskets, base, and any cracks with this solution. Let it sit for several minutes to loosen buildup.
For stubborn stains or sticky spills, use a toothbrush dipped in hot water to gently scrub the affected areas. Afterward, wipe away the loosened grime and excess liquid with a clean microfiber cloth or rag.
Avoid harsh chemicals or fragranced cleaners to keep the interior safe for food contact. This method guarantees a deep, chemical-free clean that refreshes your freezer’s interior while preserving its surfaces and eliminating lingering odors effectively.
Regular use also helps prevent the formation of mineral deposits that can harbor bacteria or cause surface damage.
Wash and Disinfect Removable Shelves and Attachments
—
First things first, let’s tackle those removable shelves. You’ll want to soak them in some warm, soapy water for a bit. This helps to loosen up any stuck-on debris, making your job a lot easier.
Once they’ve soaked for a while, grab a sponge or a brush. Use it to gently scrub away any stubborn stains. Just be careful not to scratch the surface!
After you’ve cleaned everything up, make sure to dry each piece completely. It’s best to let them air dry at room temperature. This way, you avoid any moisture buildup that could potentially damage your freezer when you reinstall them. For extra cleanliness, consider using natural disinfectants to prevent mold and mildew growth on the shelves.
—
Hope that helps!
Soaking Shelves Properly
Immerse the removable shelves and attachments in a sink filled with warm water mixed with fragrance-free dish soap to loosen food particles and stains effectively. Let them soak for at least 10–15 minutes to soften any stuck-on debris.
This step guarantees easier cleaning without harsh scrubbing. Next, gently scrub each piece using a non-abrasive sponge or brush, focusing on corners and crevices where grime accumulates. After scrubbing, rinse thoroughly with clean water to remove all soap residues.
To complete the process, follow these key points:
Use lukewarm water to avoid warping plastic shelves. Avoid harsh chemicals that can damage surfaces or leave residues. Air-dry shelves completely at room temperature before reinstalling to prevent mold growth. Using microfiber cleaning tools can enhance dirt and bacteria removal for thorough shelf sanitation.
Effective Stain Removal
To remove stubborn stains from your freezer’s removable shelves and attachments, wash them in warm water mixed with fragrance-free dish soap. Use a sponge or scrub brush to target crevices and stubborn spots.
Focus on corners and grooves where grime tends to accumulate. After scrubbing, rinse each item thoroughly to eliminate all soap residue.
Next, disinfect the surfaces with a Clorox wipe or a vinegar-based spray solution, ensuring you cover every area for effective sanitization. Avoid harsh chemicals that might leave harmful residues.
Handle each piece carefully to prevent damage. Once disinfected, set the shelves and attachments aside at room temperature to dry completely before reinstalling them in your freezer.
This methodical approach guarantees your freezer components are both clean and safe for food storage.
Thorough Drying Techniques
Once you’ve disinfected the removable shelves and attachments, make sure they dry completely before putting them back in the freezer.
Moisture trapped on these parts can cause ice buildup and promote mold growth. To prevent this, air-dry them at room temperature rather than using towels that might leave lint.
If you’re in a hurry, place them near a fan or in a warm spot, but avoid direct sunlight to prevent warping.
Consider these steps for thorough drying:
Position shelves on a drying rack to allow airflow on all sides.
Check for hidden moisture in corners or crevices and gently shake or tilt parts to release it.
Avoid reassembling until every component feels cool and dry to the touch.
This method guarantees your freezer stays clean and efficient.
Sanitize the Freezer Interior for Deep Cleaning
Regularly sanitizing the freezer interior is essential for eliminating bacteria that cleaning alone might miss.
Begin by mixing 1 tablespoon of liquid bleach with 1 gallon of water to create a disinfecting solution.
Apply this carefully to all interior surfaces, avoiding electrical components like the ice maker and control panel.
Let the solution sit for about 15 minutes to guarantee thorough sanitization.
Afterward, use a vinegar-based spray or an antibacterial agent to target any remaining microbes.
Wipe the entire interior with a clean, soap-free towel to remove residues and moisture.
This method guarantees that your freezer isn’t just visibly clean but also hygienically safe, reducing the risk of contamination and maintaining the quality of your stored food.
Dry Components Thoroughly and Reassemble the Freezer
Although the cleaning process is almost complete, you need to make sure every component is thoroughly dried before reassembling the freezer. Excess moisture can cause ice buildup, damage interior surfaces, and promote mold growth.
Use a clean cloth or paper towels to wipe down the interior walls, shelves, and drawers meticulously. Confirm that removable parts like shelves and trays are completely dry at room temperature before placing them back inside.
Pay attention to these key points when drying and reassembling:
Make sure no water remains in corners or crevices to prevent freezing issues.
Verify that the water filter and ice maker connections are dry and securely attached.
Reinstall shelves and drawers carefully to avoid misalignment or damage.
Following these steps guarantees a clean, dry environment ready for safe food storage.
Restart Your Freezer and Store Food Safely
After ensuring all components are dry and securely in place, plug your freezer back in and turn it on to allow the temperature to drop to 0°F.
Wait at least 30 minutes before returning frozen food to prevent temperature fluctuations that could compromise food safety.
Keep the freezer door closed during this cooling period to maintain efficiency. Regularly dust condenser coils to optimize performance and prevent overheating. Clean the exterior with suitable cleaners to maintain hygiene.
| Step | Action |
|---|---|
| Plug in & Power On | Restart freezer, set to 0°F |
| Cooling Period | Wait 30 minutes before restocking |
| Food Storage | Organize food by type for efficiency |
| Maintenance | Dust coils, clean exterior regularly |
Frequently Asked Questions
How Often Should I Deep Clean My Freezer?
You should deep clean your freezer about every three to six months to maintain peak hygiene and efficiency.
If you notice ice buildup, odors, or spills, clean it sooner. Regular deep cleaning prevents food contamination and keeps the appliance running smoothly.
Always remove and organize food first, then clean shelves and surfaces with natural solutions.
Dry everything thoroughly before reassembling and restarting the freezer for best results.
Can I Use Bleach Directly on Freezer Surfaces?
You shouldn’t use bleach directly on freezer surfaces. It’s like throwing a volcano into a snowstorm.
Instead, dilute 1 tablespoon of liquid bleach per gallon of water for safe sanitizing.
Spray or wipe the solution on, let it sit for about 15 minutes, then thoroughly rinse and dry.
This method kills germs without damaging your freezer’s interior or risking harsh chemical residue that could contaminate your food.
What’s the Best Way to Prevent Freezer Odors?
To prevent freezer odors, you should regularly clean spills and remove expired food promptly.
Store strong-smelling items in airtight containers or sealed bags to contain odors.
Place an open box of baking soda inside; it absorbs odors effectively, but replace it every three months.
Also, keep the freezer dry by wiping away moisture, as mold and mildew cause smells.
Finally, make certain proper airflow by avoiding overpacking, which helps maintain fresh air circulation.
Is It Safe to Clean the Freezer While It’s Plugged In?
You shouldn’t clean the freezer while it’s plugged in. Unplugging it guarantees your safety by preventing electrical shock and avoids accidental damage to the appliance.
It also allows the freezer to defrost naturally, making cleaning easier. Keep electrical components like the ice maker and control panel dry during cleaning.
Once you finish, dry everything thoroughly before plugging it back in and restarting the unit for safe, efficient operation.
How Do I Maintain Freezer Efficiency Between Cleanings?
You absolutely must dust the condenser coils regularly. They’re the unsung heroes keeping your freezer cool.
Neglecting this is like expecting a marathon runner to sprint with a backpack full of bricks.
Keep door seals clean and airtight, avoid overloading, and defrost promptly to prevent ice buildup.
Monitor temperature settings precisely, aiming for 0°F.
These methodical steps guarantee your freezer runs smoothly, saving energy and extending its lifespan between cleanings.
Simple Steps for a Cleaner, Better-Running Freezer
Now that your freezer is sparkling clean, it’s like giving your food a fresh, icy home to thrive in. By following these steps methodically, removing items, safely thawing, vacuuming debris, and sanitizing every nook, you’ve secured a healthy environment that preserves flavor and freshness.
Take your time drying and reassembling everything before restarting. With this thorough care, your freezer will run efficiently, keeping your food safe and delicious for weeks to come.

One Comment