Best Way to Get Rid of Mould in Shower: Natural Solutions
To get rid of mold in your shower, start by ventilating the space thoroughly to reduce moisture and spores.
Clean grime with detergent and water. Then apply a bleach solution or hydrogen peroxide on affected tile, grout, or silicone seams, allowing 10–15 minutes for full action.
Scrub with a stiff brush, rinse, and dry completely. Replace mold-infested caulk to stop persistent growth.
Regular ventilation and moisture control are essential to prevent mold’s return. Further steps can enhance your mold-fighting strategy.
Key Takeaways
- Ventilate the bathroom thoroughly by running the exhaust fan and opening windows during and after showering to reduce moisture and mold growth.
- Clean initial grime with detergent and water before applying mold removers for better effectiveness on mold-infested surfaces.
- Use a bleach solution or commercial mold remover on tile and grout, letting it sit 10–15 minutes before scrubbing with a stiff brush.
- Remove and replace mold-infested caulk or silicone seals to prevent persistent mold growth in porous sealants.
- Dry all surfaces completely after cleaning and use preventive habits like squeegeeing and regular ventilation to inhibit mold regrowth.
Why Mold Loves Your Shower: And Why That’s a Problem?

Many factors in your shower create an ideal environment for mold growth, making it a frequent problem in bathrooms. Mold thrives in warm, damp, and poorly ventilated spaces, such as your shower.
The constant moisture from water splashing on tile, grout, and caulk provides the hydration mold spores need to germinate and multiply. Porous materials like grout and caulking trap water, promoting fungal colonization.
Additionally, organic residues from soap scum and skin cells supply nutrients that accelerate mold development. Limited airflow in enclosed shower areas slows drying, further encouraging mold persistence.
Understanding these conditions helps explain why mold often appears in your shower and why it requires targeted cleaning and preventive measures to disrupt its growth cycle effectively. Improving ventilation and drying can significantly reduce mold growth by preventing moisture buildup.
Getting Your Shower Ready for Mold Cleaning
Before you dive into cleaning, it’s really important to ventilate your bathroom. This helps to cut down on airborne spores and moisture, making the whole process a lot easier.
Next, go ahead and take out all your shower items—like bottles and mats. This way, you can really see and reach every surface that needs attention. Plus, it helps you tackle those mold-prone areas more effectively. Trust me, this prep work makes a world of difference!
To protect your shower surfaces during cleaning, consider the porosity levels of your materials to prevent staining and damage.
Ventilate Bathroom Thoroughly
To guarantee effective mold removal, ventilate your bathroom thoroughly by maximizing airflow through exhaust fans and open windows.
Proper ventilation reduces humidity levels, limiting mold’s ability to thrive. Run the exhaust fan during and for at least 20 to 30 minutes after showering to expel moist air efficiently.
When possible, open windows fully to increase natural air exchange and accelerate drying. Avoid using ventilation methods that recycle humid air, as this can sustain mold growth.
Maintaining consistent airflow prevents moisture accumulation on shower surfaces and grout, which are common mold breeding grounds. Ensuring your bathroom dries quickly after use is critical in breaking mold’s lifecycle.
Prioritize ventilation before and during cleaning to improve the efficacy of mold treatments and reduce the likelihood of recurrence.
Good ventilation also helps prevent the buildup of harmful moisture accumulation, which can cause damage to bathroom fixtures over time.
Remove Shower Items
Clear all bottles, mats, and personal items from your shower to expose every surface for thorough mold cleaning. Removing these obstacles guarantees you can access hidden mold growth in corners, grout lines, and door tracks.
This step is essential for effective treatment and prevents missed spots that allow mold to persist.
Follow these key actions:
- Remove all shampoo, soap, and conditioner bottles to avoid contamination and allow cleaning solution to reach walls and shelves.
- Take out mats and towels to prevent mold transfer and create a dry environment.
- Clear personal items like razors and brushes to protect them from harsh chemicals and guarantee complete surface exposure.
Additionally, ensure proper airflow or use a dehumidifier after cleaning to help dry surfaces quickly and inhibit mold regrowth, a crucial part of routine maintenance.
The Best Cleaners for Beating Shower Mold
Choose cleaners that combine effectiveness with safety to tackle shower mold efficiently. A common and scientifically proven solution is a bleach mixture, one cup of bleach per gallon of water. This is ideal for tile and grout surfaces. It breaks down mold spores effectively when applied and left for 10 to 15 minutes before scrubbing.
Commercial mold removers, formulated with antimicrobials, target stubborn mold. Always check ingredient safety and ventilation requirements. Hydrogen peroxide offers a non-toxic alternative for stained grout and silicone seams. It oxidizes mold cells without harmful fumes.
Detergent and water are necessary for initial grime removal, ensuring cleaner contact with mold. Always wear protective gloves and masks to avoid exposure. Selecting cleaners based on your shower’s material and mold severity maximizes removal efficiency while minimizing health risks. For safety, it is also important to use personal protective equipment such as gloves, goggles, and respirators when handling mold cleaners and moldy surfaces.
Step-By-Step Mold Removal for Shower Surfaces
To tackle mold in your shower, first things first—let’s get that space ready! Clear off all your toiletries and make sure there’s some good airflow. Open a window or turn on the fan if you can.
Next up, grab your mold remover and apply it evenly across the affected areas. Let it sit for about 10 to 15 minutes. This gives it time to really break down the mold.
Once that’s done, it’s time to scrub! Get in there and really work at it. After you’ve scrubbed away the mold, give everything a good rinse to wash away any residue. This little step is key to keeping mold from coming back in the future!
Wearing protective gear such as gloves and a mask during cleaning is essential to ensure your safety from mold exposure.
Preparing Shower Surfaces
Before you start scrubbing, make sure the bathroom is well-ventilated by opening a window or running an exhaust fan to reduce airborne mold spores and chemical fumes.
Next, clear the shower area by removing bottles, mats, and other items to expose all surfaces. This guarantees thorough cleaning and prevents contamination.
Then, dry the surfaces completely, as moisture encourages mold growth and reduces cleaner effectiveness.
Follow these steps precisely:
- Ventilate thoroughly to protect your respiratory health and enhance drying.
- Remove all objects for unrestricted access and to avoid spreading spores.
- Dry surfaces fully to maximize cleaning efficiency and prevent regrowth.
Proper preparation scientifically optimizes mold removal by improving cleaner contact and limiting mold spread. Using a pH-neutral remover is recommended to safely eliminate mold without damaging marble or other natural stone surfaces.
Applying Mold Remover
Spray the mold remover directly onto the affected shower surfaces, guaranteeing even coverage over all visible growth. Let the solution sit for 10 to 15 minutes, allowing its active ingredients to penetrate and break down mold structures.
Work in small sections to keep the cleaner wet long enough for effective action.
| Surface Type | Recommended Mold Remover |
|---|---|
| Tile and Grout | Bleach solution (1 cup/gallon) |
| Nonporous Surfaces | Commercial mold remover |
| Silicone Seams | Hydrogen peroxide or clinging cleaner |
| Caulk | Specialized mold remover or replacement |
Always wear protective gear and ensure good ventilation to avoid inhaling fumes. This step readies the mold for removal without damaging surfaces. It is also important to maintain good ventilation and wear protective equipment to minimize mold spore exposure during cleaning.
Scrubbing And Rinsing
Once the mold remover has had sufficient time to act, you’ll need to scrub the affected areas thoroughly to dislodge and eliminate mold residues.
Use a stiff-bristle brush on grout and textured surfaces for maximum effectiveness.
Work systematically in small sections to keep the cleaner active long enough to break down the mold.
After scrubbing, rinse the surfaces completely with water to remove all chemical residues, which can attract dirt and moisture if left behind.
Follow these essential steps:
- Scrub with detergent or bleach solution, focusing on grout and corners.
- Rinse thoroughly to make certain no cleaner remains.
- Dry the area completely to prevent mold regrowth.
This precise approach reduces mold presence scientifically and protects your shower’s integrity.
For ongoing prevention, consider using a fungicidal disinfectant to help control mold regrowth after cleaning.
How to Scrub Shower Tile and Grout to Remove Mold?
Tackle shower tile and grout mold by applying a bleach solution or commercial mold remover directly onto the affected areas.
Allow it to sit for 10 to 15 minutes to break down the growth effectively.
Work in small sections to keep the cleaner wet and active.
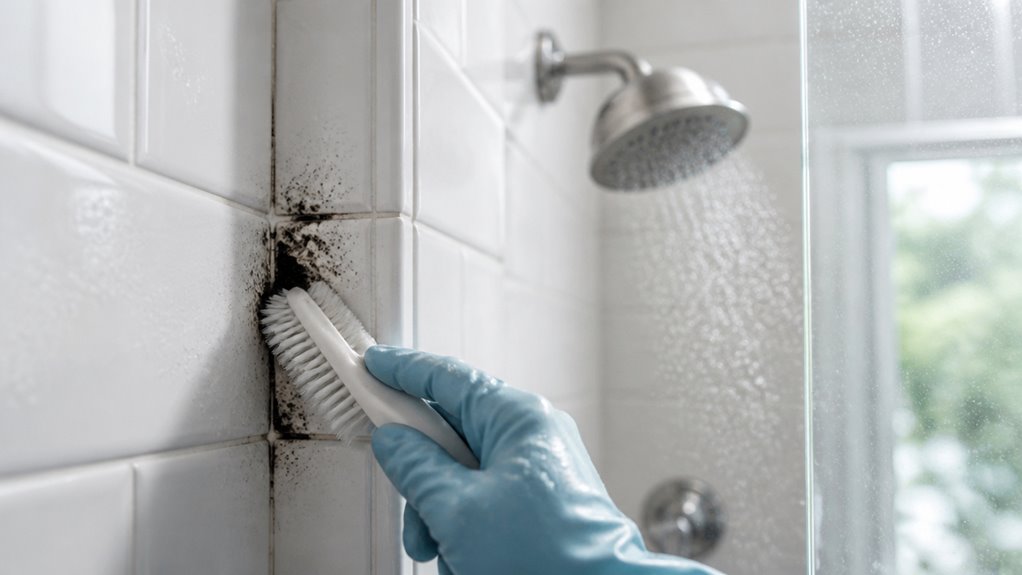
Use a stiff-bristle brush to scrub grout lines and textured tile surfaces, focusing pressure on stubborn mold spots.
Avoid over-saturating porous grout to prevent moisture retention.
After scrubbing, rinse thoroughly with water to remove residues that can trap dirt and moisture, promoting regrowth.
Ensure proper ventilation and wear protective gear, including gloves and a mask, to minimize exposure to mold spores and cleaning chemicals.
Repeat as necessary, but persistent mold may indicate underlying moisture or ventilation issues.
Performing a colorfastness test before extensive application helps protect surfaces from discoloration or damage.
Replacing Moldy Shower Caulk and Silicone Seals
Remove old, mold-infested caulk and silicone seals promptly to prevent persistent mold growth and moisture damage in your shower.
Remove moldy caulk and seals quickly to stop ongoing mold growth and protect your shower from moisture damage.
Mold often penetrates caulk, making surface cleaning ineffective and allowing moisture to accumulate behind seals. This compromises shower integrity.
To replace moldy caulk and silicone seals:
- Thoroughly remove existing caulk using a caulk remover tool or razor blade, ensuring no residue remains.
- Clean the area with detergent and allow it to fully dry to prevent trapping moisture beneath new sealant.
- Apply fresh, mold-resistant silicone caulk evenly, smoothing it to create a tight, continuous seal.
This method interrupts mold’s life cycle and restores the waterproof barrier essential for a healthy, durable shower environment.
Staying Safe While Cleaning Shower Mold
After replacing moldy caulk and silicone seals, you’ll want to focus on protecting yourself during the cleaning process. Always wear rubber gloves, a face mask, and eye protection to prevent skin, respiratory, and eye irritation from mold spores and cleaning agents.
Avoid mixing chemicals; combining bleach with ammonia or other cleaners produces toxic fumes. Increase ventilation by using an exhaust fan or opening a window to disperse airborne particles. If mold growth is extensive, wear an N95 respirator for enhanced respiratory protection.
Keep children, pets, and toiletries out of the cleaning area until you finish rinsing and drying surfaces. These precautions reduce health risks and guarantee a safer, more effective mold removal experience in your shower.
What to Do When Mold Keeps Coming Back?
If mold keeps cropping up despite your cleaning efforts, it’s often a sign that underlying moisture issues or residue buildup are at play.
Recurring mold usually indicates hidden moisture problems or leftover residue fueling its growth.
Simply scrubbing won’t solve the problem if moisture remains trapped or residue lingers to feed mold growth.
To tackle recurring mold, you should:
1. Replace moldy caulk instead of scrubbing repeatedly, especially when stains persist.
Mold can hide behind degraded sealant.
2. Use a clinging cleaner or hydrogen peroxide on stained grout if surface cleaning doesn’t remove mold effectively.
3. Address ventilation or drying issues rigorously.
Persistent mold typically signals inadequate airflow or moisture control rather than cleaning failure.
Daily and Weekly Habits to Keep Shower Mold Away
Consistently practicing key daily and weekly habits can markedly reduce the risk of mold growth in your shower.
Daily, squeegee walls, doors, and floors immediately after showering to eliminate standing water. Wipe wet surfaces dry with a towel, and leave the shower door or curtain open to facilitate moisture escape.
Keep bath mats and towels dry and off the floor to reduce dampness.
Weekly, clean grout, caulk, and corners with a mold-fighting cleaner or vinegar spray to inhibit fungal growth. Maintain cleanliness by removing residues that trap moisture.
These routines minimize surface moisture and organic material, critical factors for mold development. Your consistent attention to drying and cleaning disrupts mold’s growth cycle, noticeably lowering its chance of establishing in your shower environment.
Improving Shower Ventilation to Prevent Mold
To keep mold at bay in your shower, it’s a good idea to run the exhaust fan while you’re showering and for at least 20 to 30 minutes afterward. This really helps cut down on moisture buildup.
And hey, if you can, open a window! It boosts air circulation, speeds up drying, and further lowers the risk of mold.
Exhaust Fan Usage
Regularly running your bathroom’s exhaust fan during and after showers plays a critical role in reducing moisture buildup that fosters mold growth.
This ventilation method accelerates drying, removing the humid environment mold spores need to thrive.
To optimize exhaust fan usage, you should:
- Run the fan for at least 20 to 30 minutes post-shower to secure thorough moisture removal.
- Clean the exhaust fan grille and cover monthly to maintain prime airflow and efficiency.
- Avoid turning off the fan immediately after showering; premature shutdown traps residual humidity.
Window Ventilation Benefits
Enhancing bathroom ventilation by opening windows during and after showers markedly reduces moisture levels that encourage mold growth.
When you open a window, you increase air exchange, which helps remove humid air that settles on shower surfaces. This direct ventilation accelerates drying, lowering the relative humidity that mold spores thrive in.
You should open the window fully for at least five minutes after showering to maximize moisture removal. Combining window ventilation with an exhaust fan creates cross-ventilation, further improving airflow and drying efficiency.
Keep in mind that consistent window use prevents moisture accumulation behind tiles and grout, reducing the likelihood of persistent mold.
Frequently Asked Questions
Can Mold in the Shower Cause Health Problems?
Yes, mold in your shower can cause health problems, especially if you’re sensitive or have respiratory issues.
Exposure to mold spores may trigger allergic reactions, asthma attacks, or irritation of your eyes, nose, and throat.
Prolonged exposure increases risks for vulnerable individuals.
You should wear protective gear when cleaning and ensure good ventilation to reduce spore inhalation.
Preventing mold growth helps protect your respiratory health effectively.
Are Natural Remedies Effective Against Shower Mold?
Natural remedies like vinegar and hydrogen peroxide can be effective against shower mold, especially in early or light infestations.
You’ll need to apply them directly to the mold, let them sit for 10-15 minutes, then scrub thoroughly.
However, they may not eliminate stubborn mold in grout or caulk as efficiently as bleach or commercial cleaners.
For persistent mold, combining natural methods with proper ventilation and drying is vital to prevent regrowth.
How Long Does Mold Take to Grow in a Shower?
Mold can begin to grow in your shower within 24 to 48 hours under the right conditions.
High humidity and moisture provide an ideal environment for mold spores to settle and multiply quickly.
If you don’t dry surfaces or ventilate properly, mold will establish itself rapidly.
That’s why controlling moisture and improving airflow immediately after showering is essential to prevent mold from gaining a foothold in less than two days.
Can Shower Mold Damage Bathroom Fixtures?
Yes, shower mold can damage bathroom fixtures over time. Mold produces acids and enzymes that degrade materials like grout, caulk, and sometimes even tile surfaces.
It can weaken sealants, causing leaks and water damage beneath fixtures. If left untreated, mold can accelerate deterioration, leading to costly repairs.
You should address mold growth promptly to protect your fixtures and maintain structural integrity in your bathroom.
Is Professional Mold Remediation Necessary for Small Bathroom Mold?
You usually don’t need professional mold remediation for small bathroom mold if you address it promptly.
Small mold patches can be effectively removed using proper cleaning techniques, such as scrubbing with detergent, bleach solutions, or commercial removers.
Combining these methods with ventilation and drying is essential.
However, if mold recurs despite these efforts or covers a large area, consulting a professional is advisable.
This ensures thorough removal and helps prevent health risks.
Keep Your Shower Mold-Free with Effective Cleaning Techniques
Mold thrives in showers because of constant moisture. Studies show that up to 50% of homes have mold issues in bathrooms.
By preparing your shower properly, using effective cleaners, and following safe scrubbing techniques, you can markedly reduce mold presence.
Consistent ventilation and cleaning routines are essential since mold spores can return if neglected.
Understanding these steps helps you maintain a healthier shower environment and prevents potential respiratory problems linked to mold exposure.